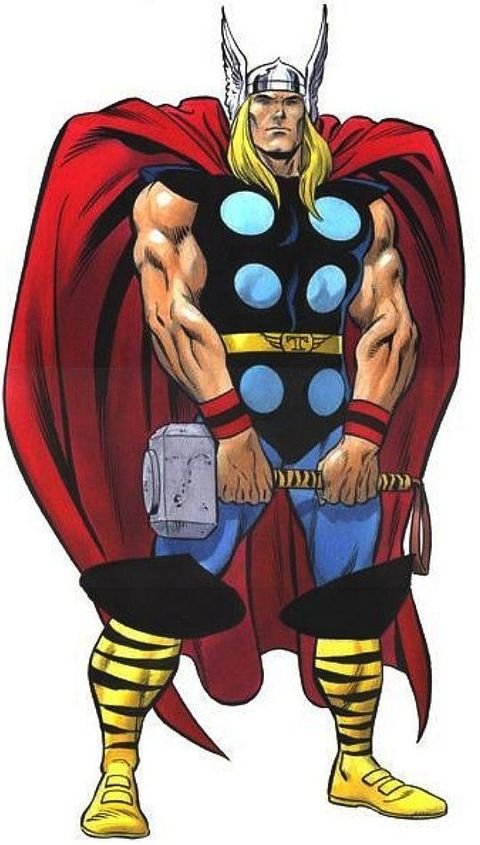
Classic Thor Concept
The latest Thor project is an original take on the classic comic version with some Norse influence in details and styling. I began by thinking about how to create a period style but keep the overall look recognizable as the classic comic character. After some brainstorming and sketching, I had an overall concept I was happy with.
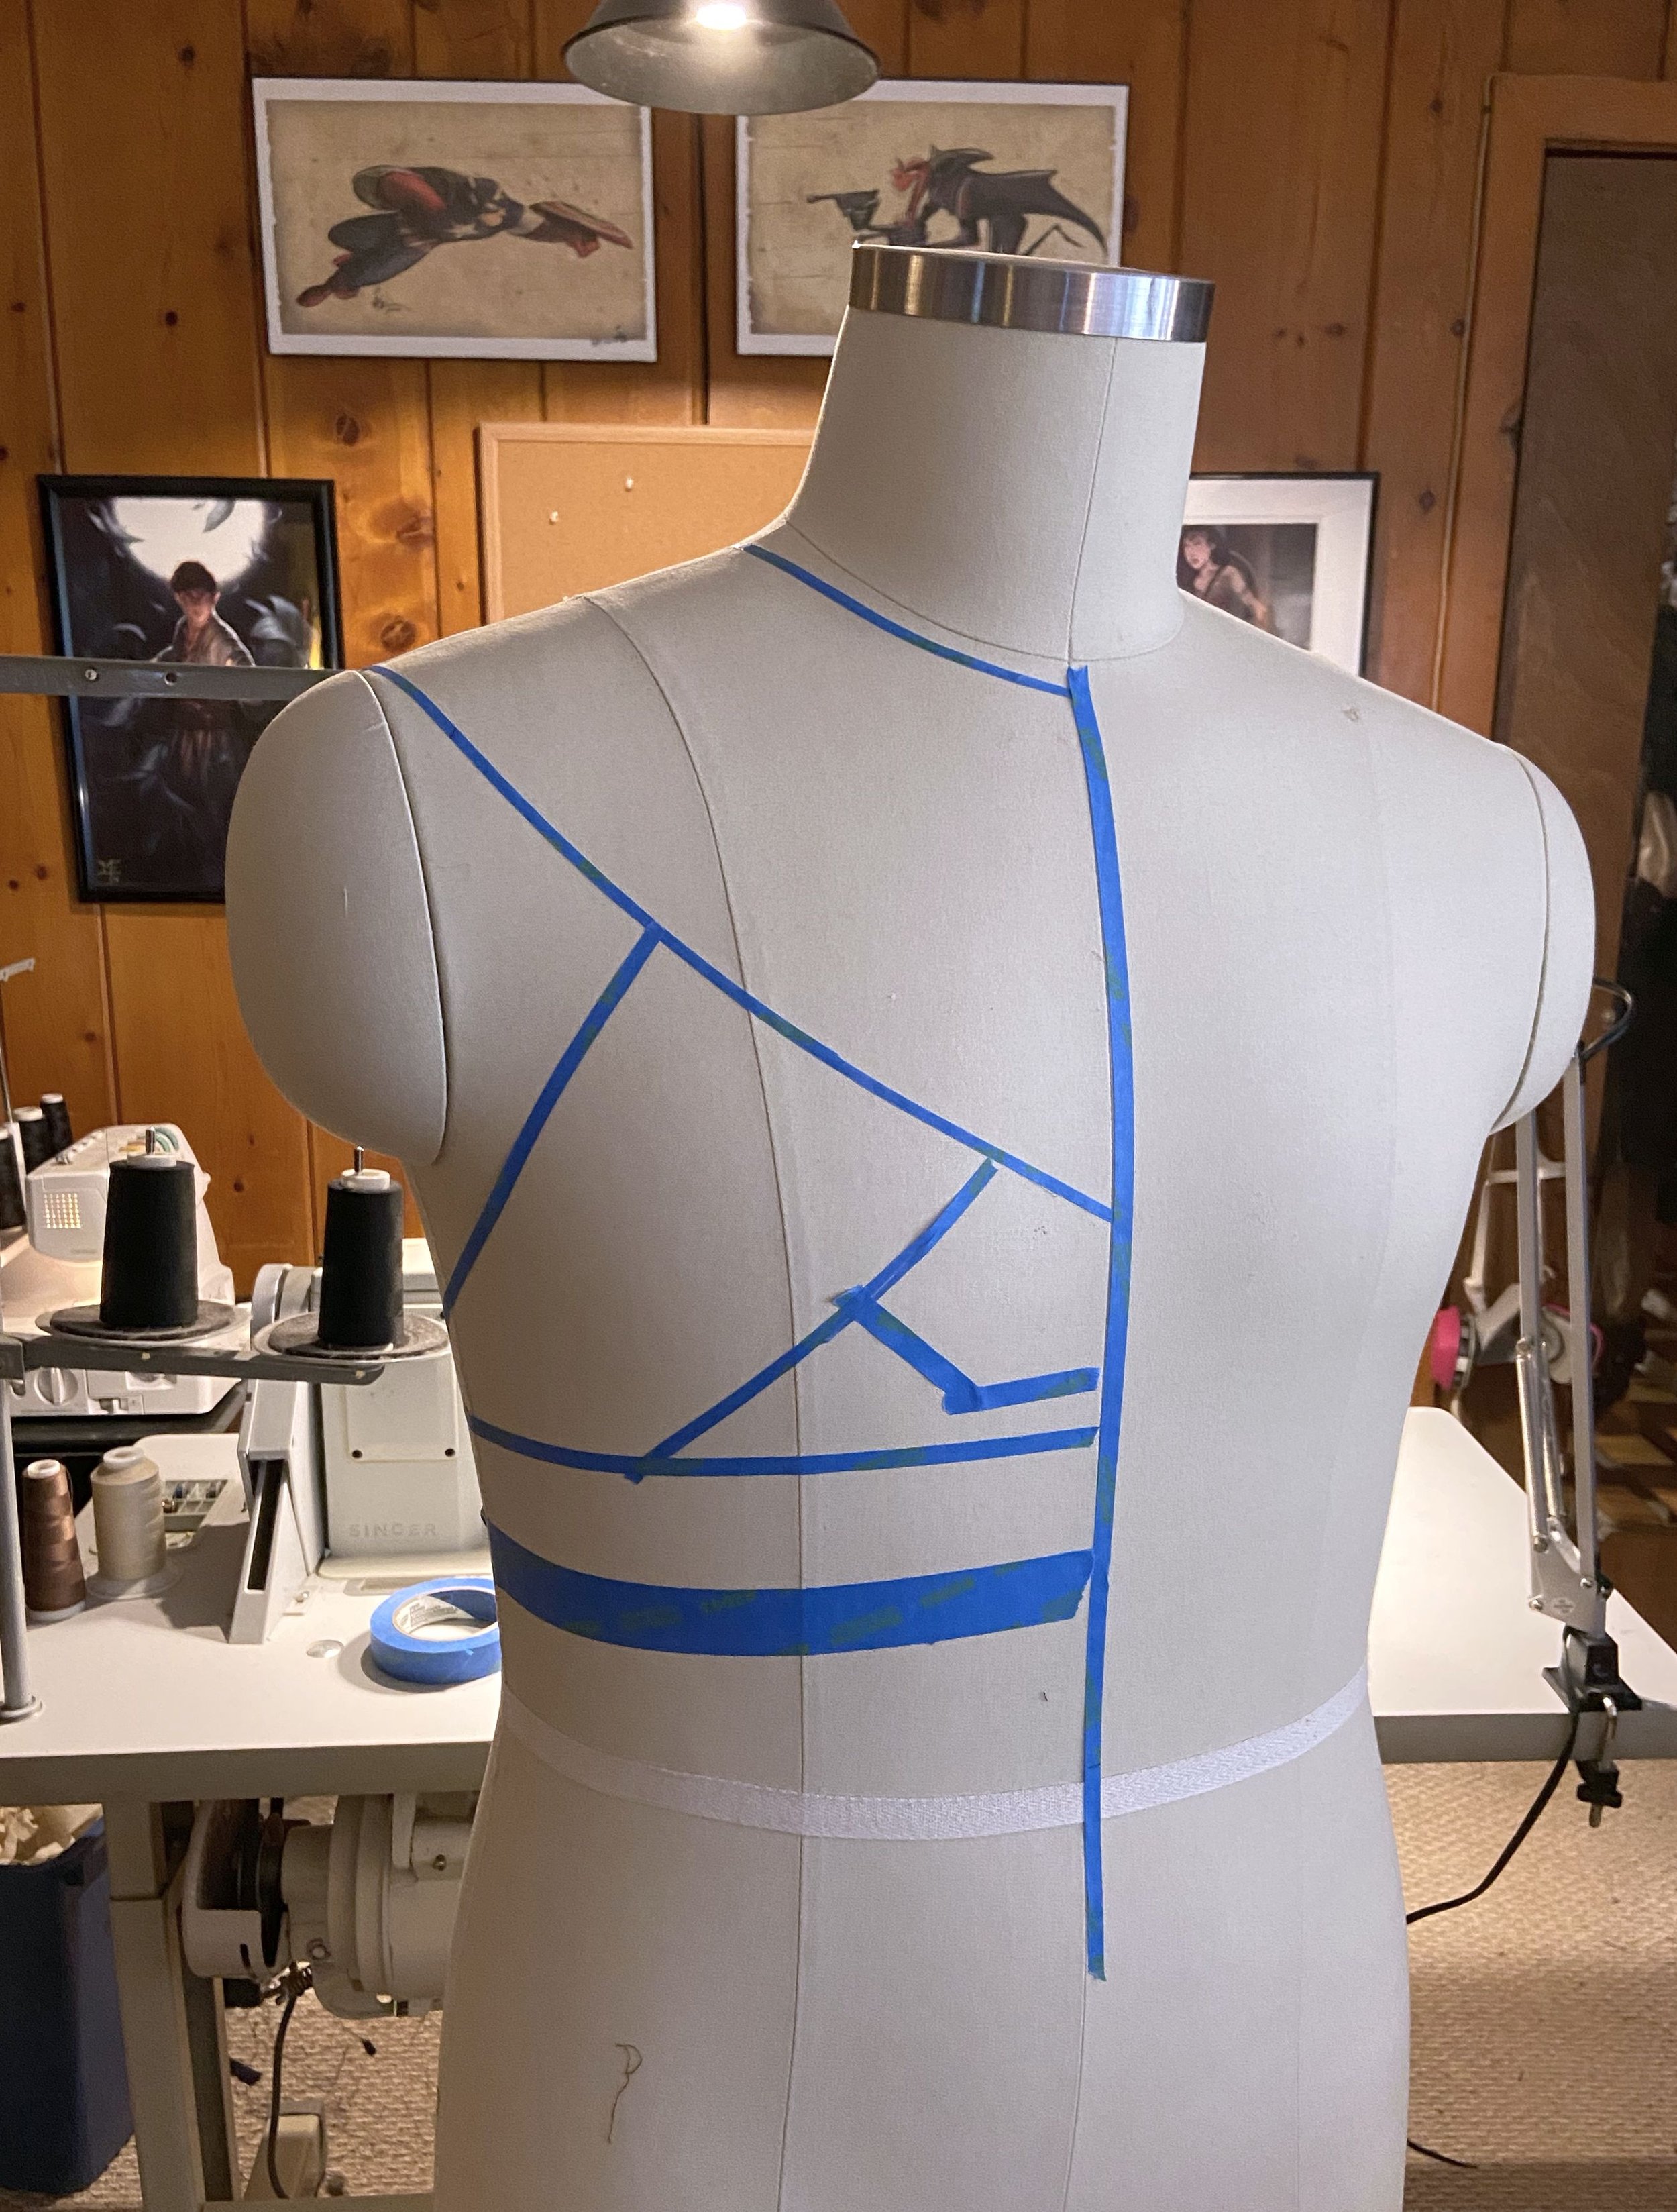
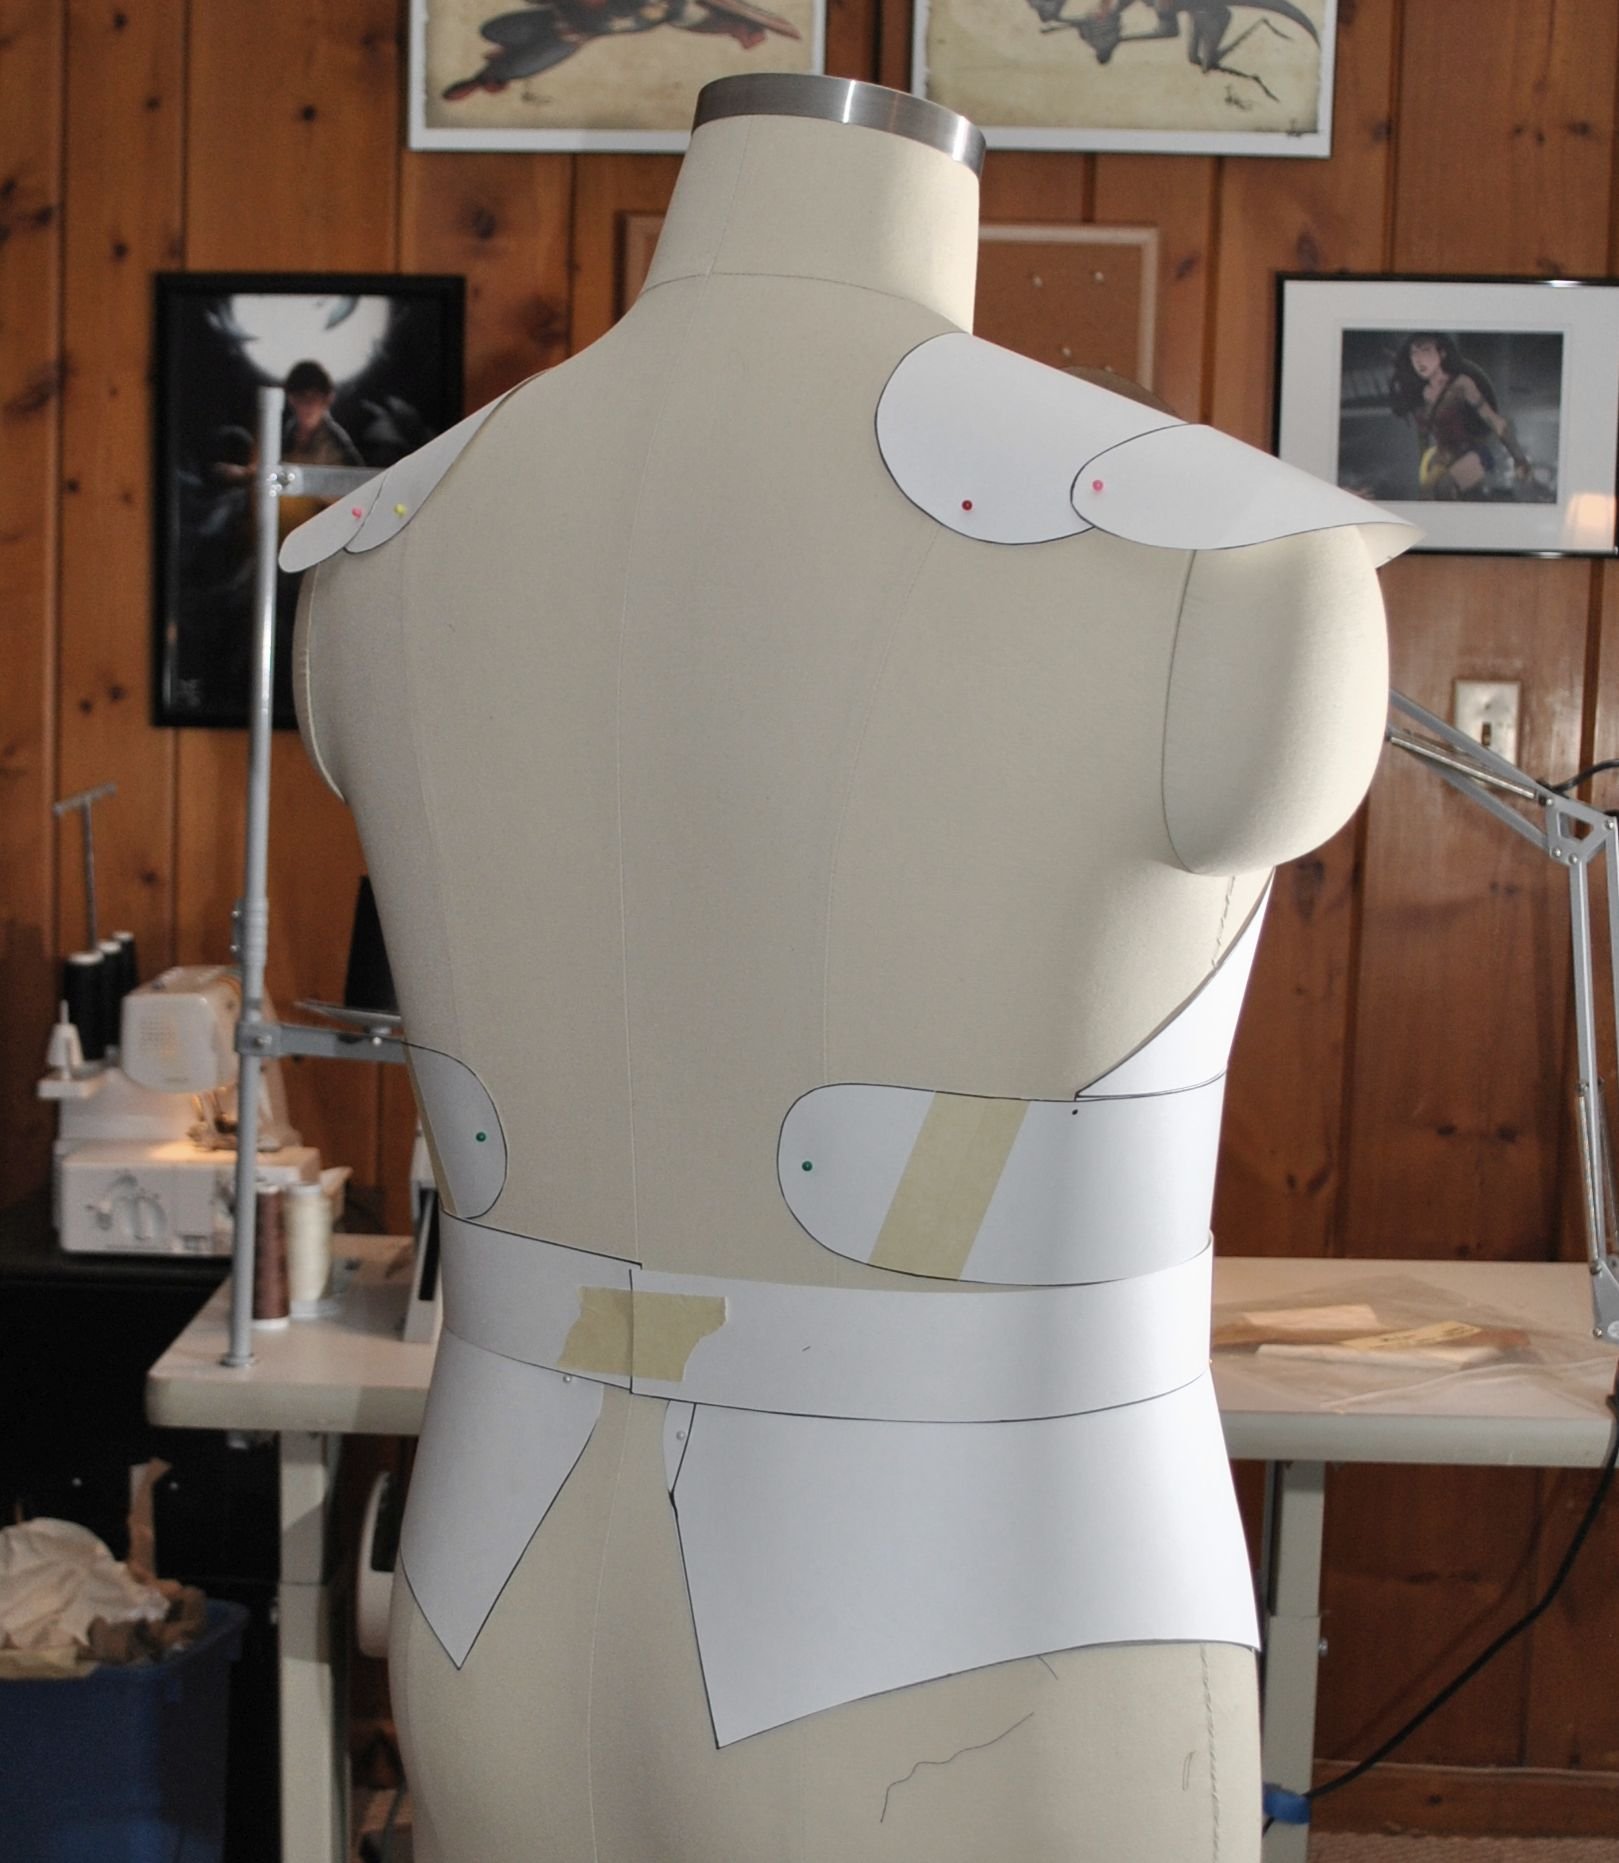
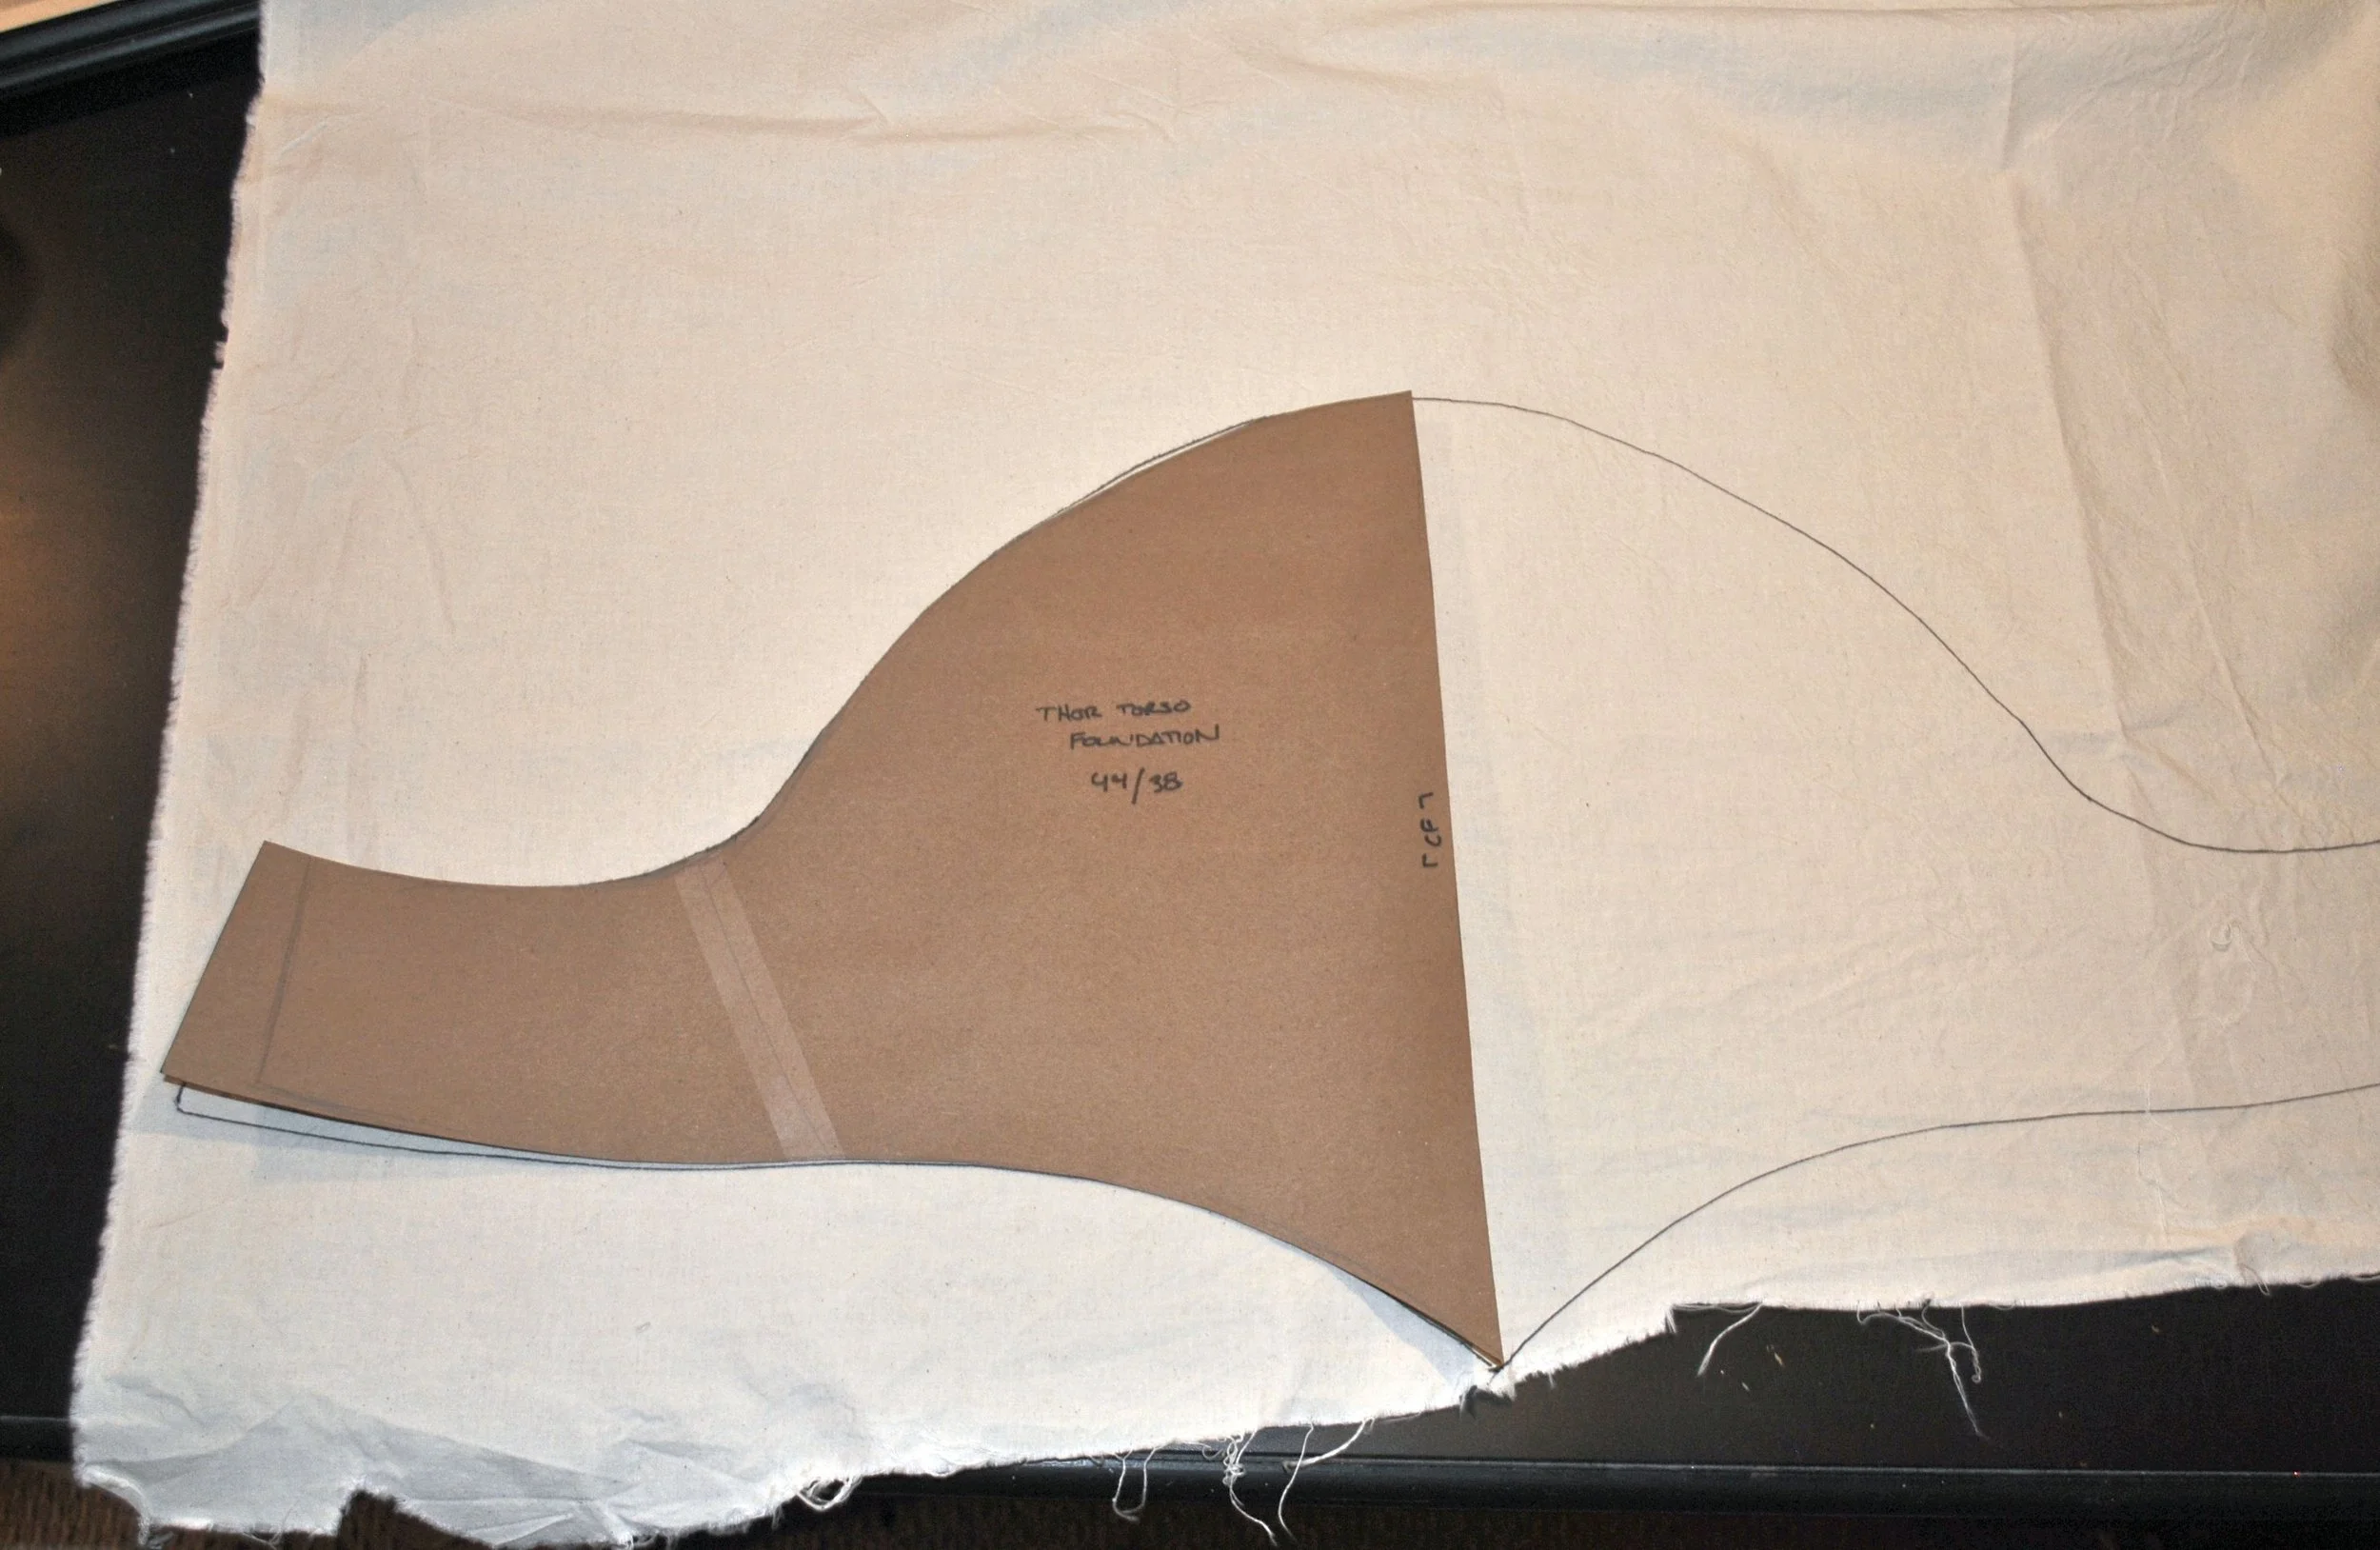
I began developing the base armor patterns on a form and refined them until I had all of the pieces mapped out in poster board.
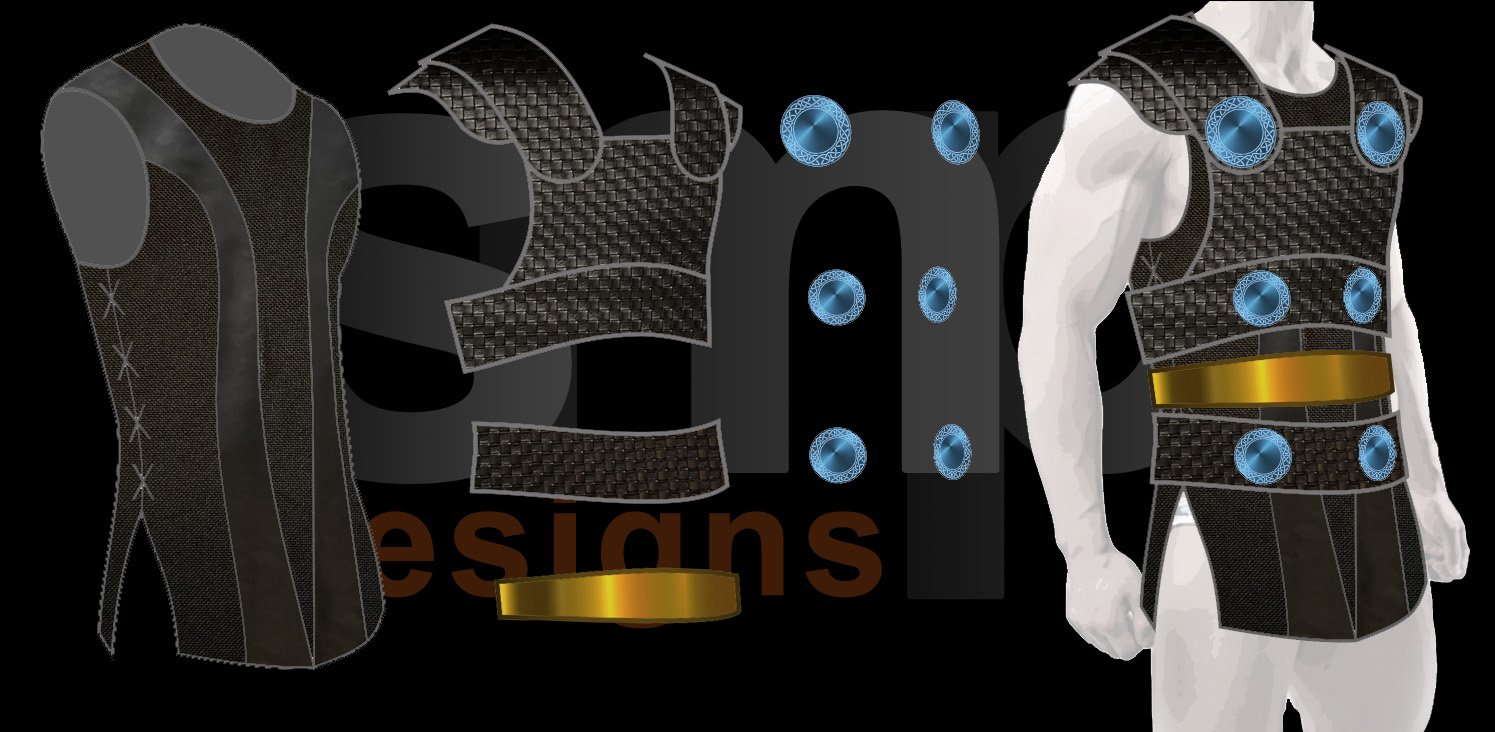
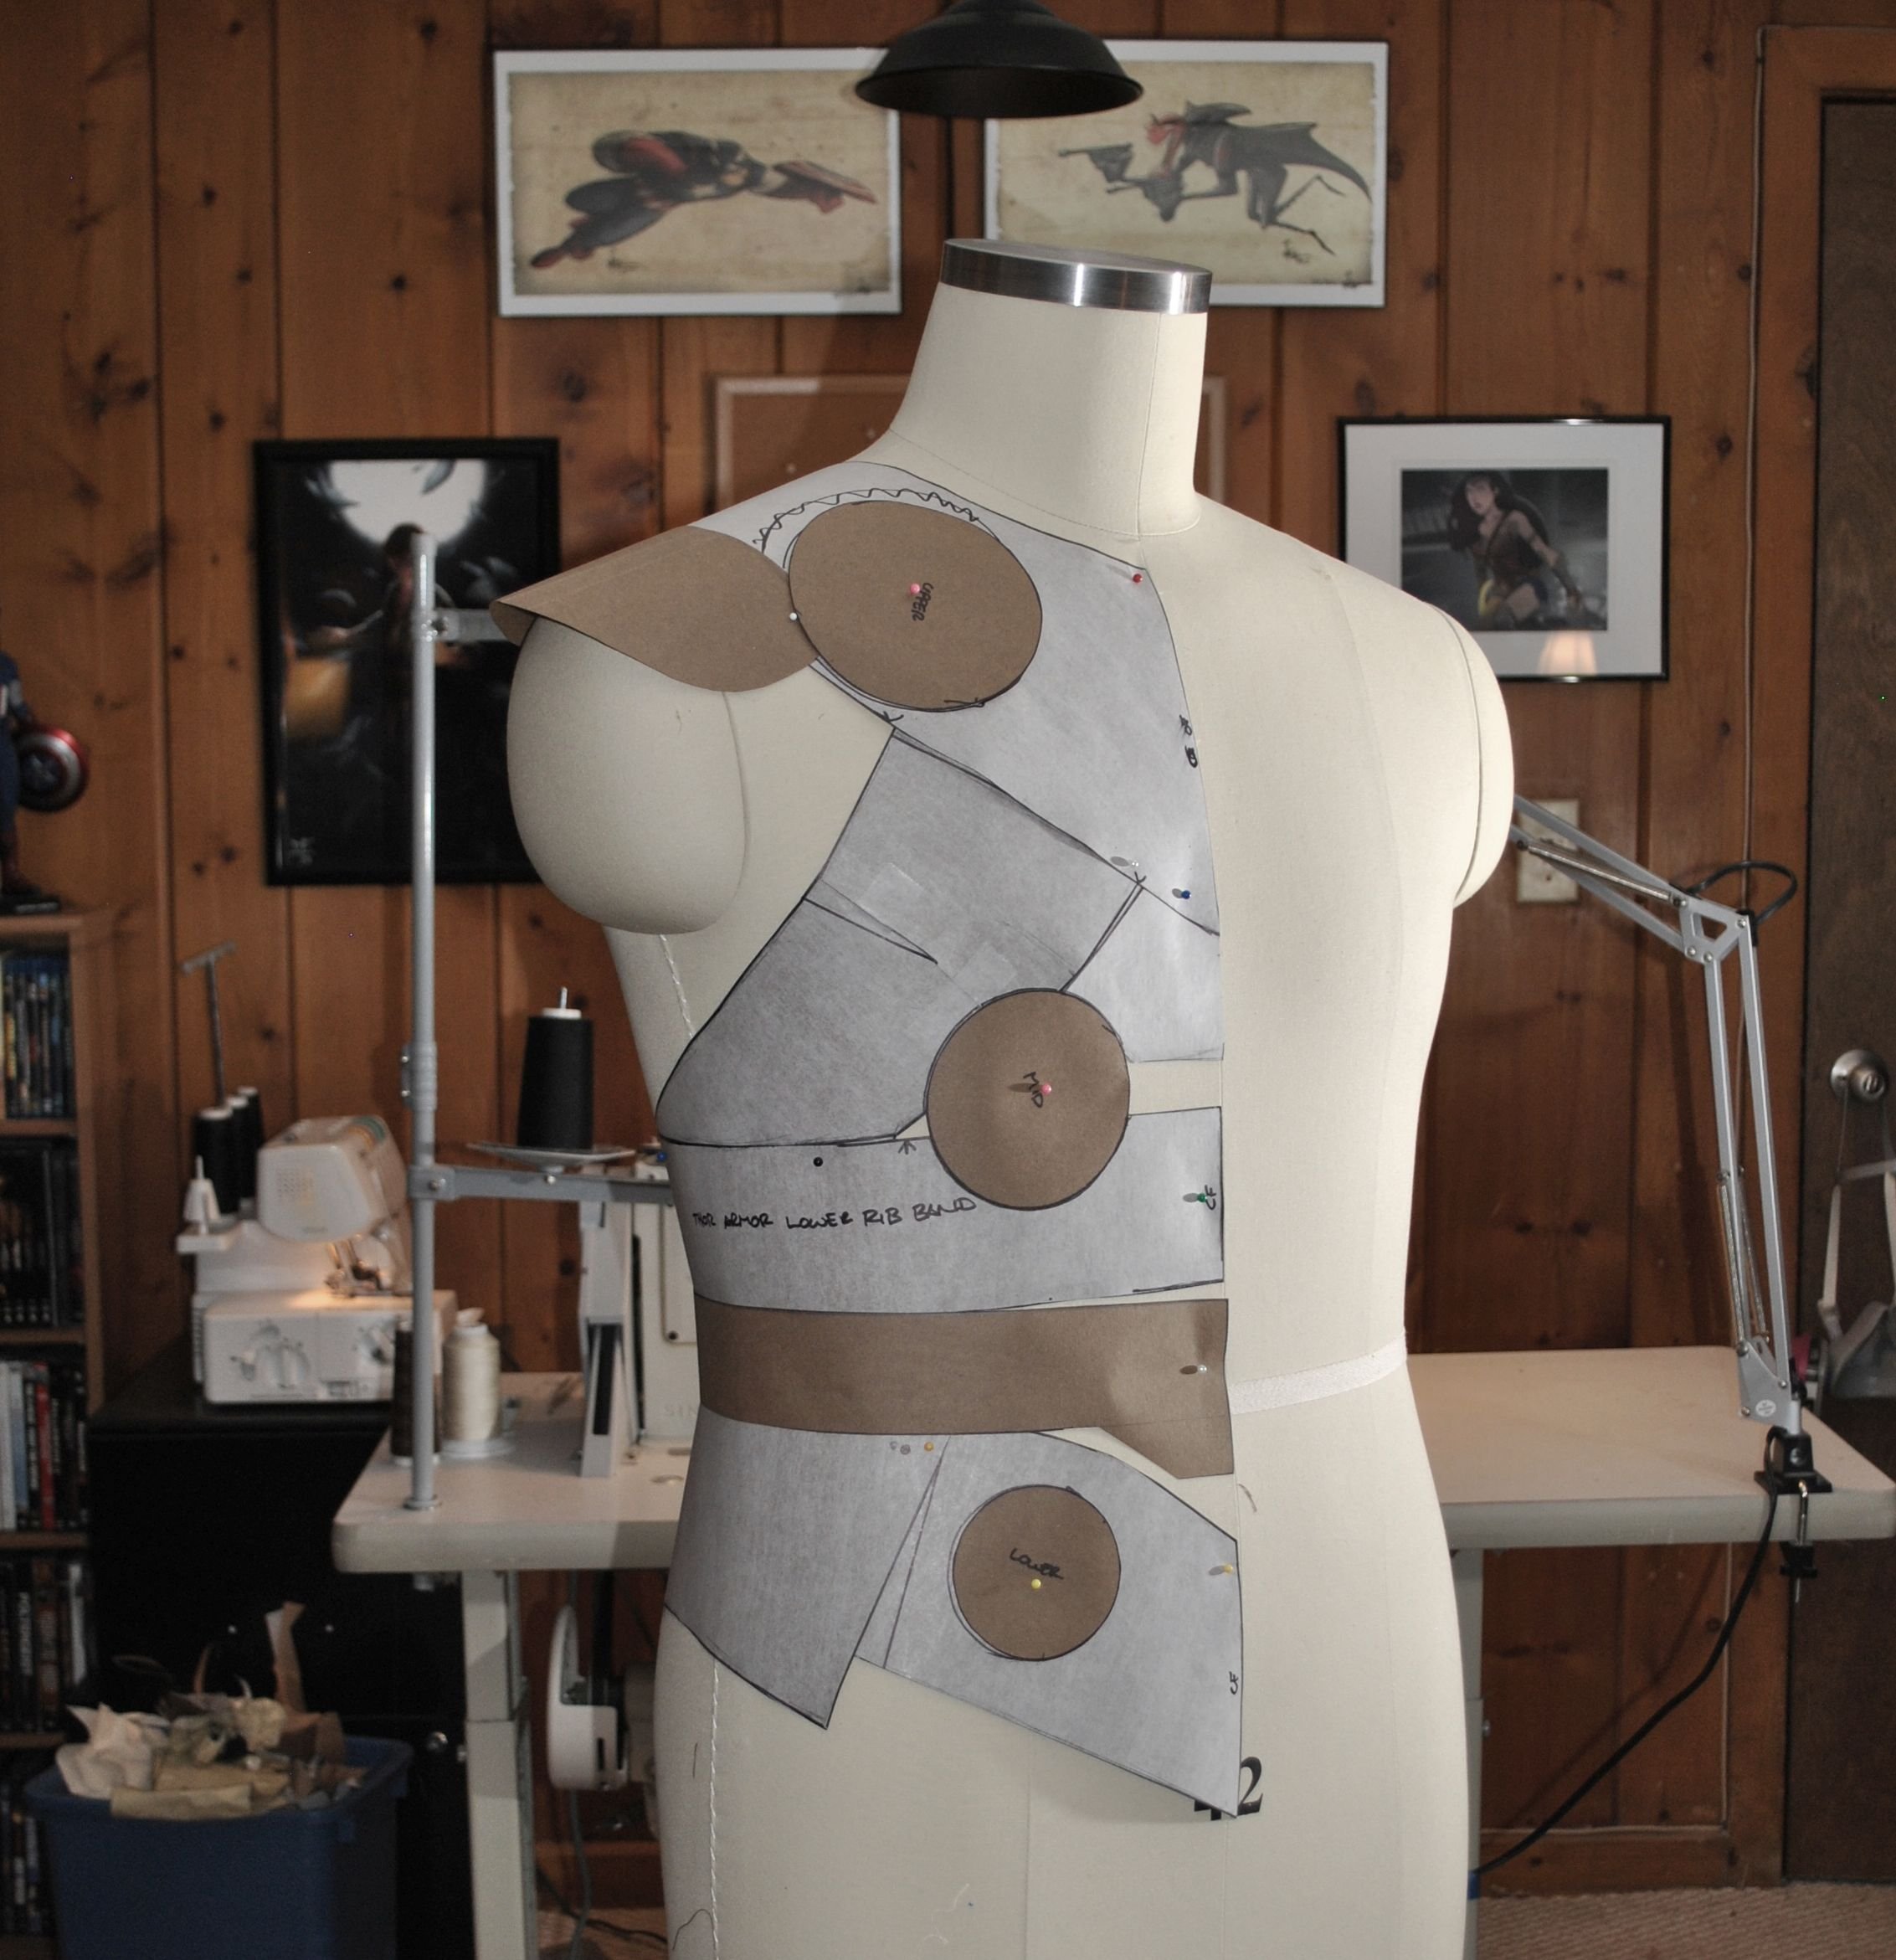
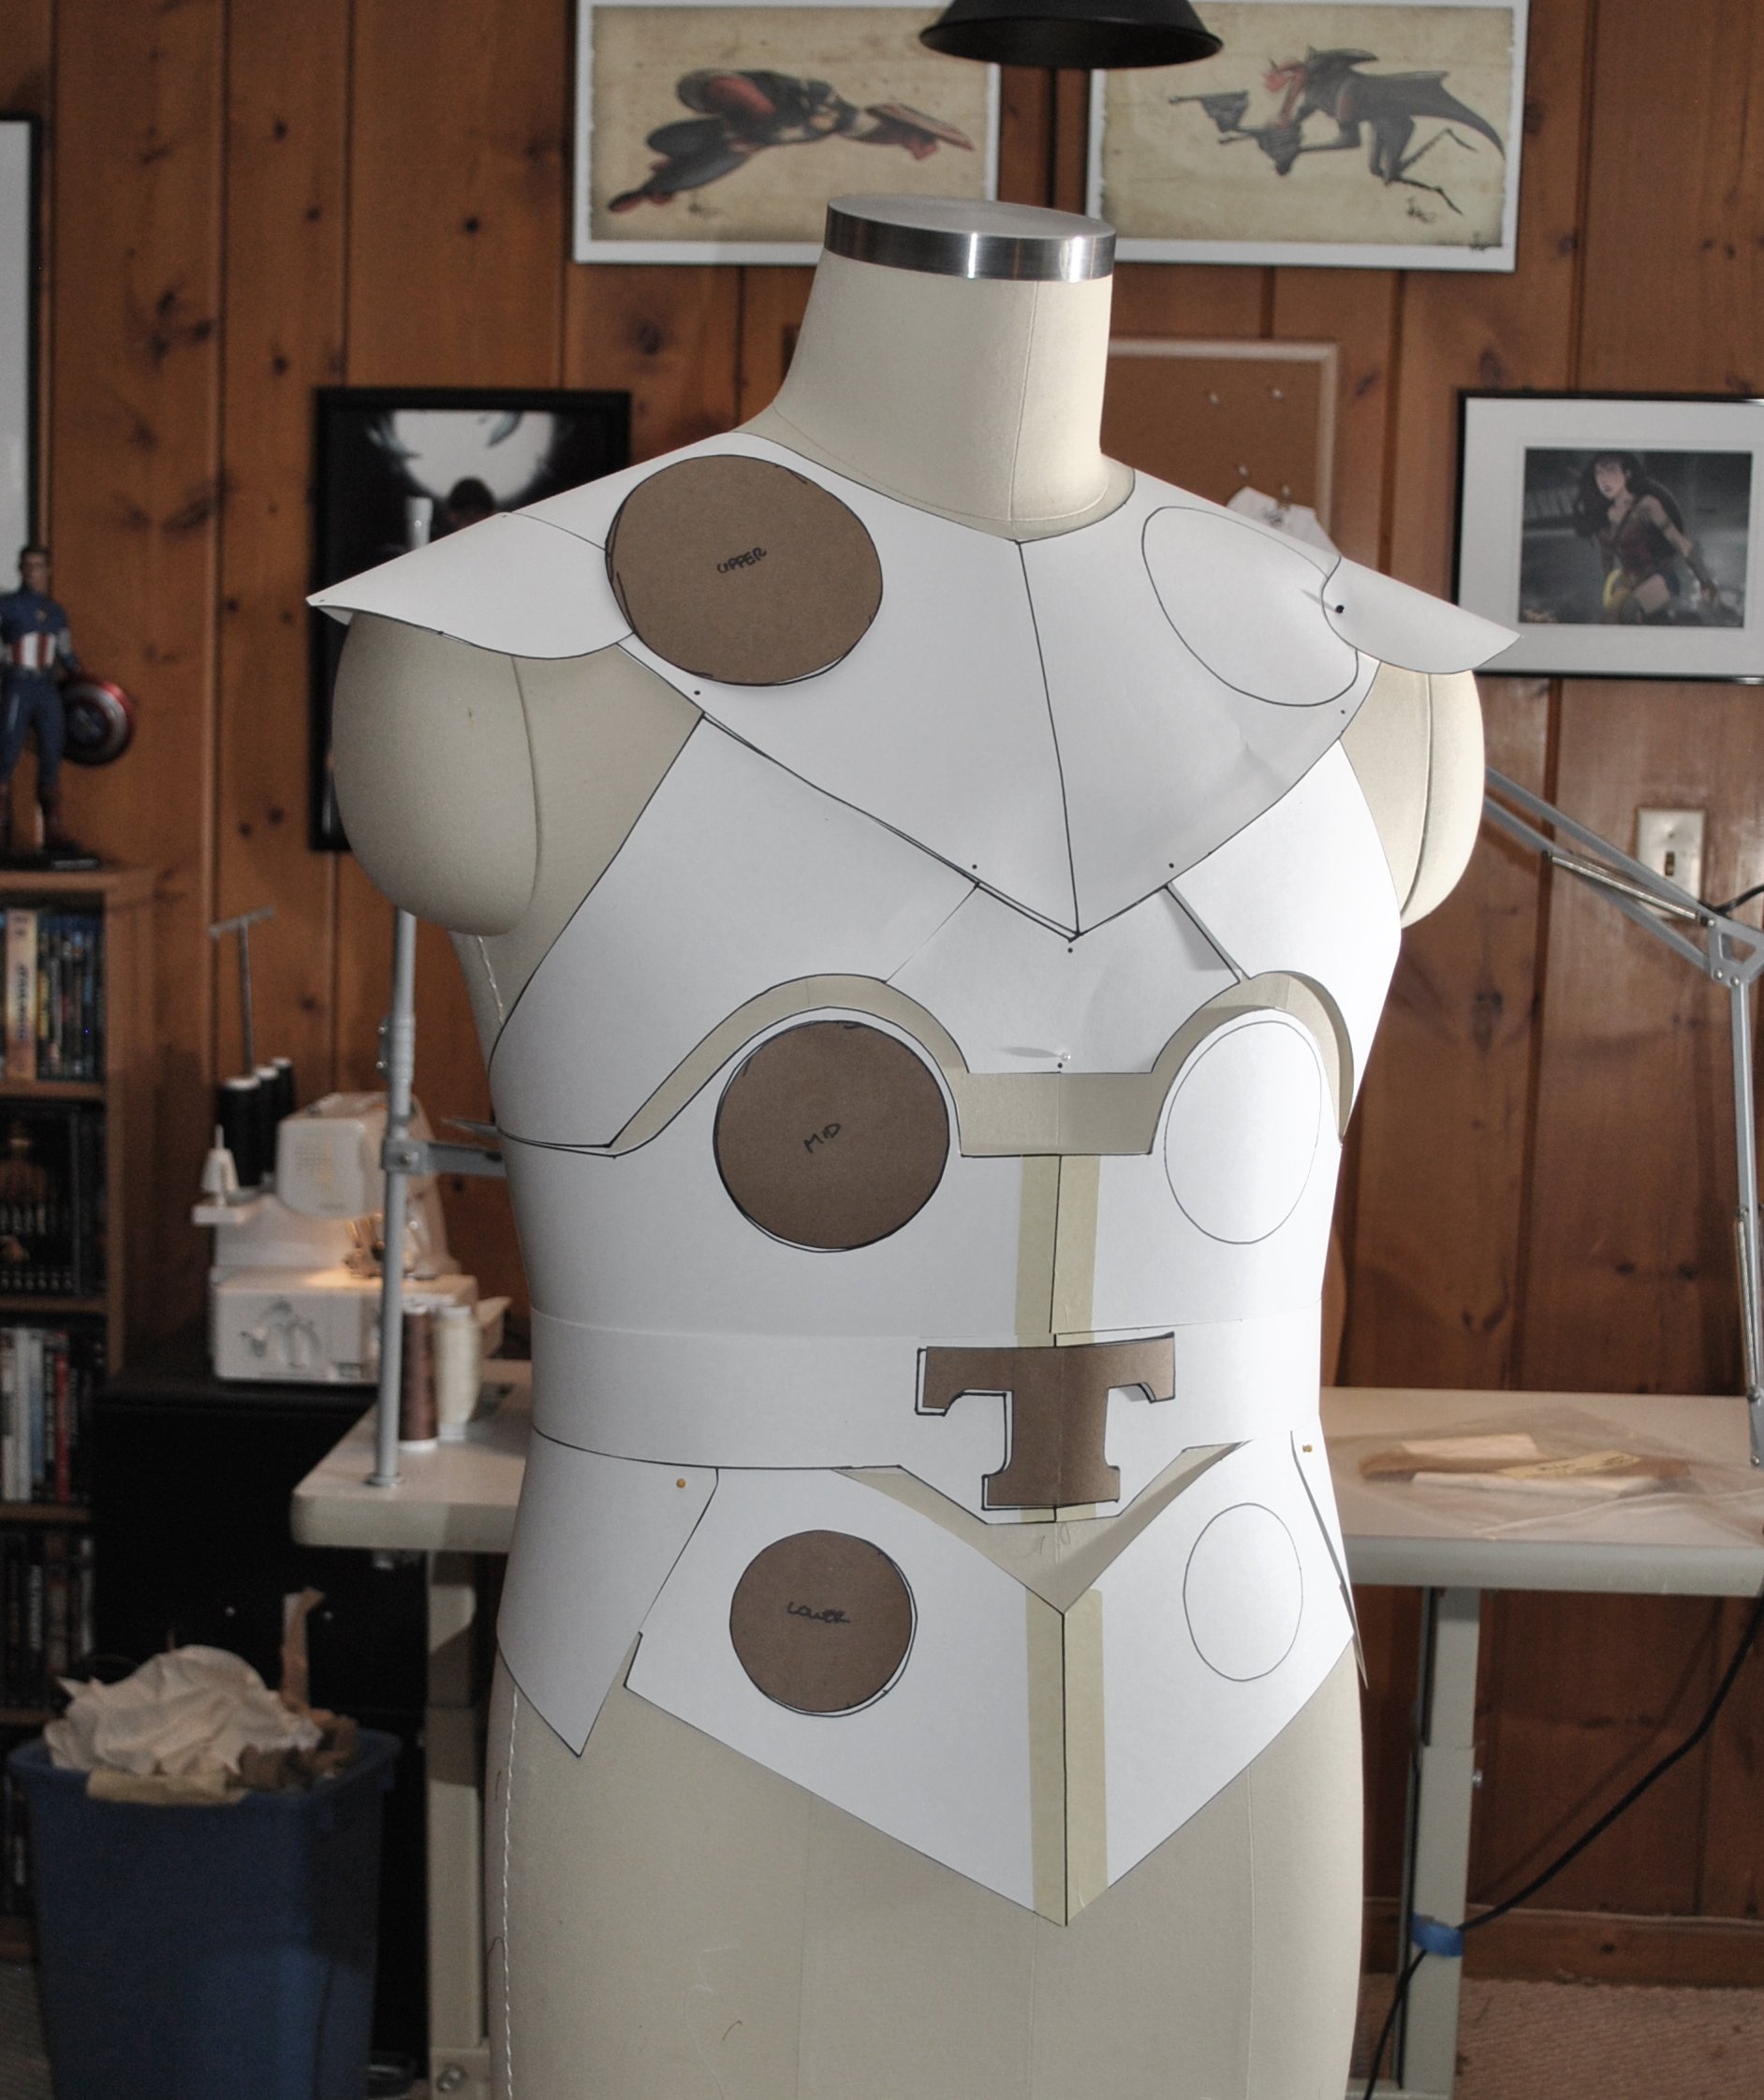
I knew I wanted to add some embossed motifs to the armor pieces. However, since the bulk of the armor was made in faux leather, I needed to come up with a solution. I decided that I would create ‘plates’ that would fit onto certain parts of the armor and have them laser etched in genuine leather. I created the templates for these pieces and then worked on adding some nice Norse-style designs.
Using Inkscape, I created all of the plates for the armor, the discs, and the belt buckle to scale and saved them as SVG vector files. Once I was happy with the designs, I printed them to test fit on the poster board armor templates. The files were then sent out to have the leather pieces laser cut/etched and the discs/buckle 3D printed.


With the printed/etched pieces in progress, I started building out the armor.
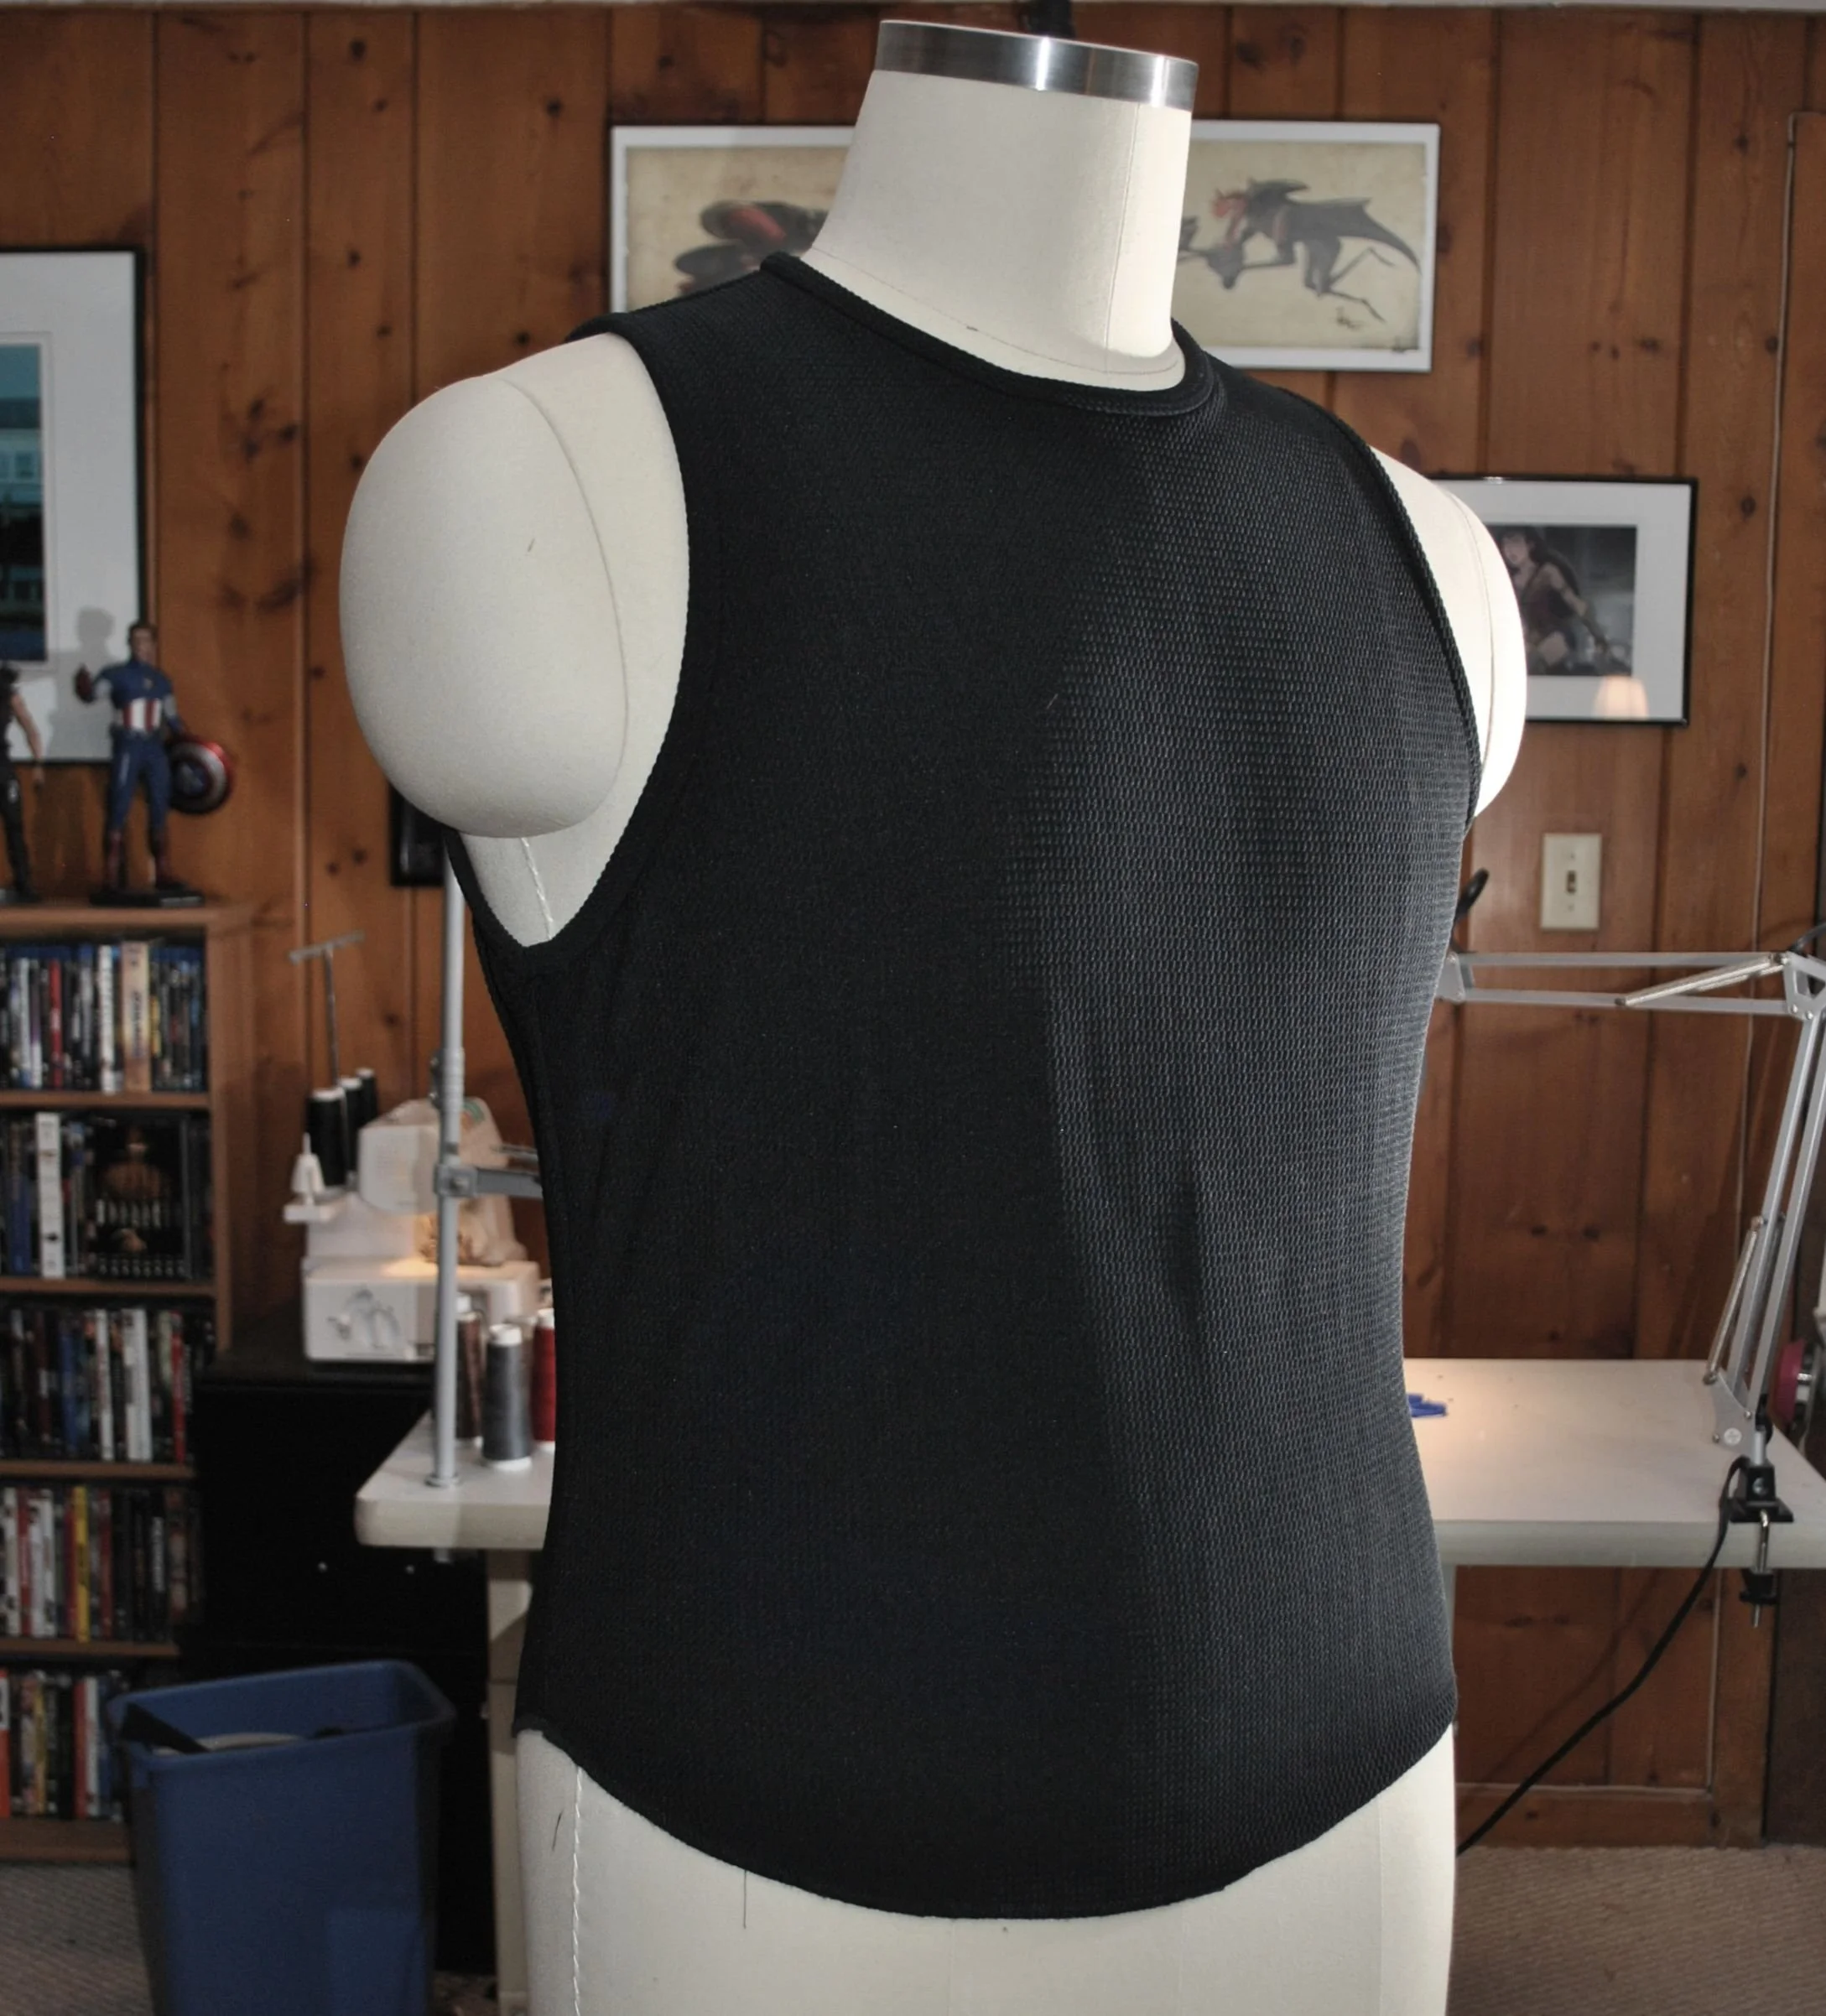
The armor vest will have a foundation piece that connects the torso from the chest to the waist and around the ribs, filling in the gaps between the main pieces. This piece was made by backing black burlap with muslin.

I then began building the rest of the armor pieces by backing black faux leather with headliner foam and binding the edges with a thin black faux leather.
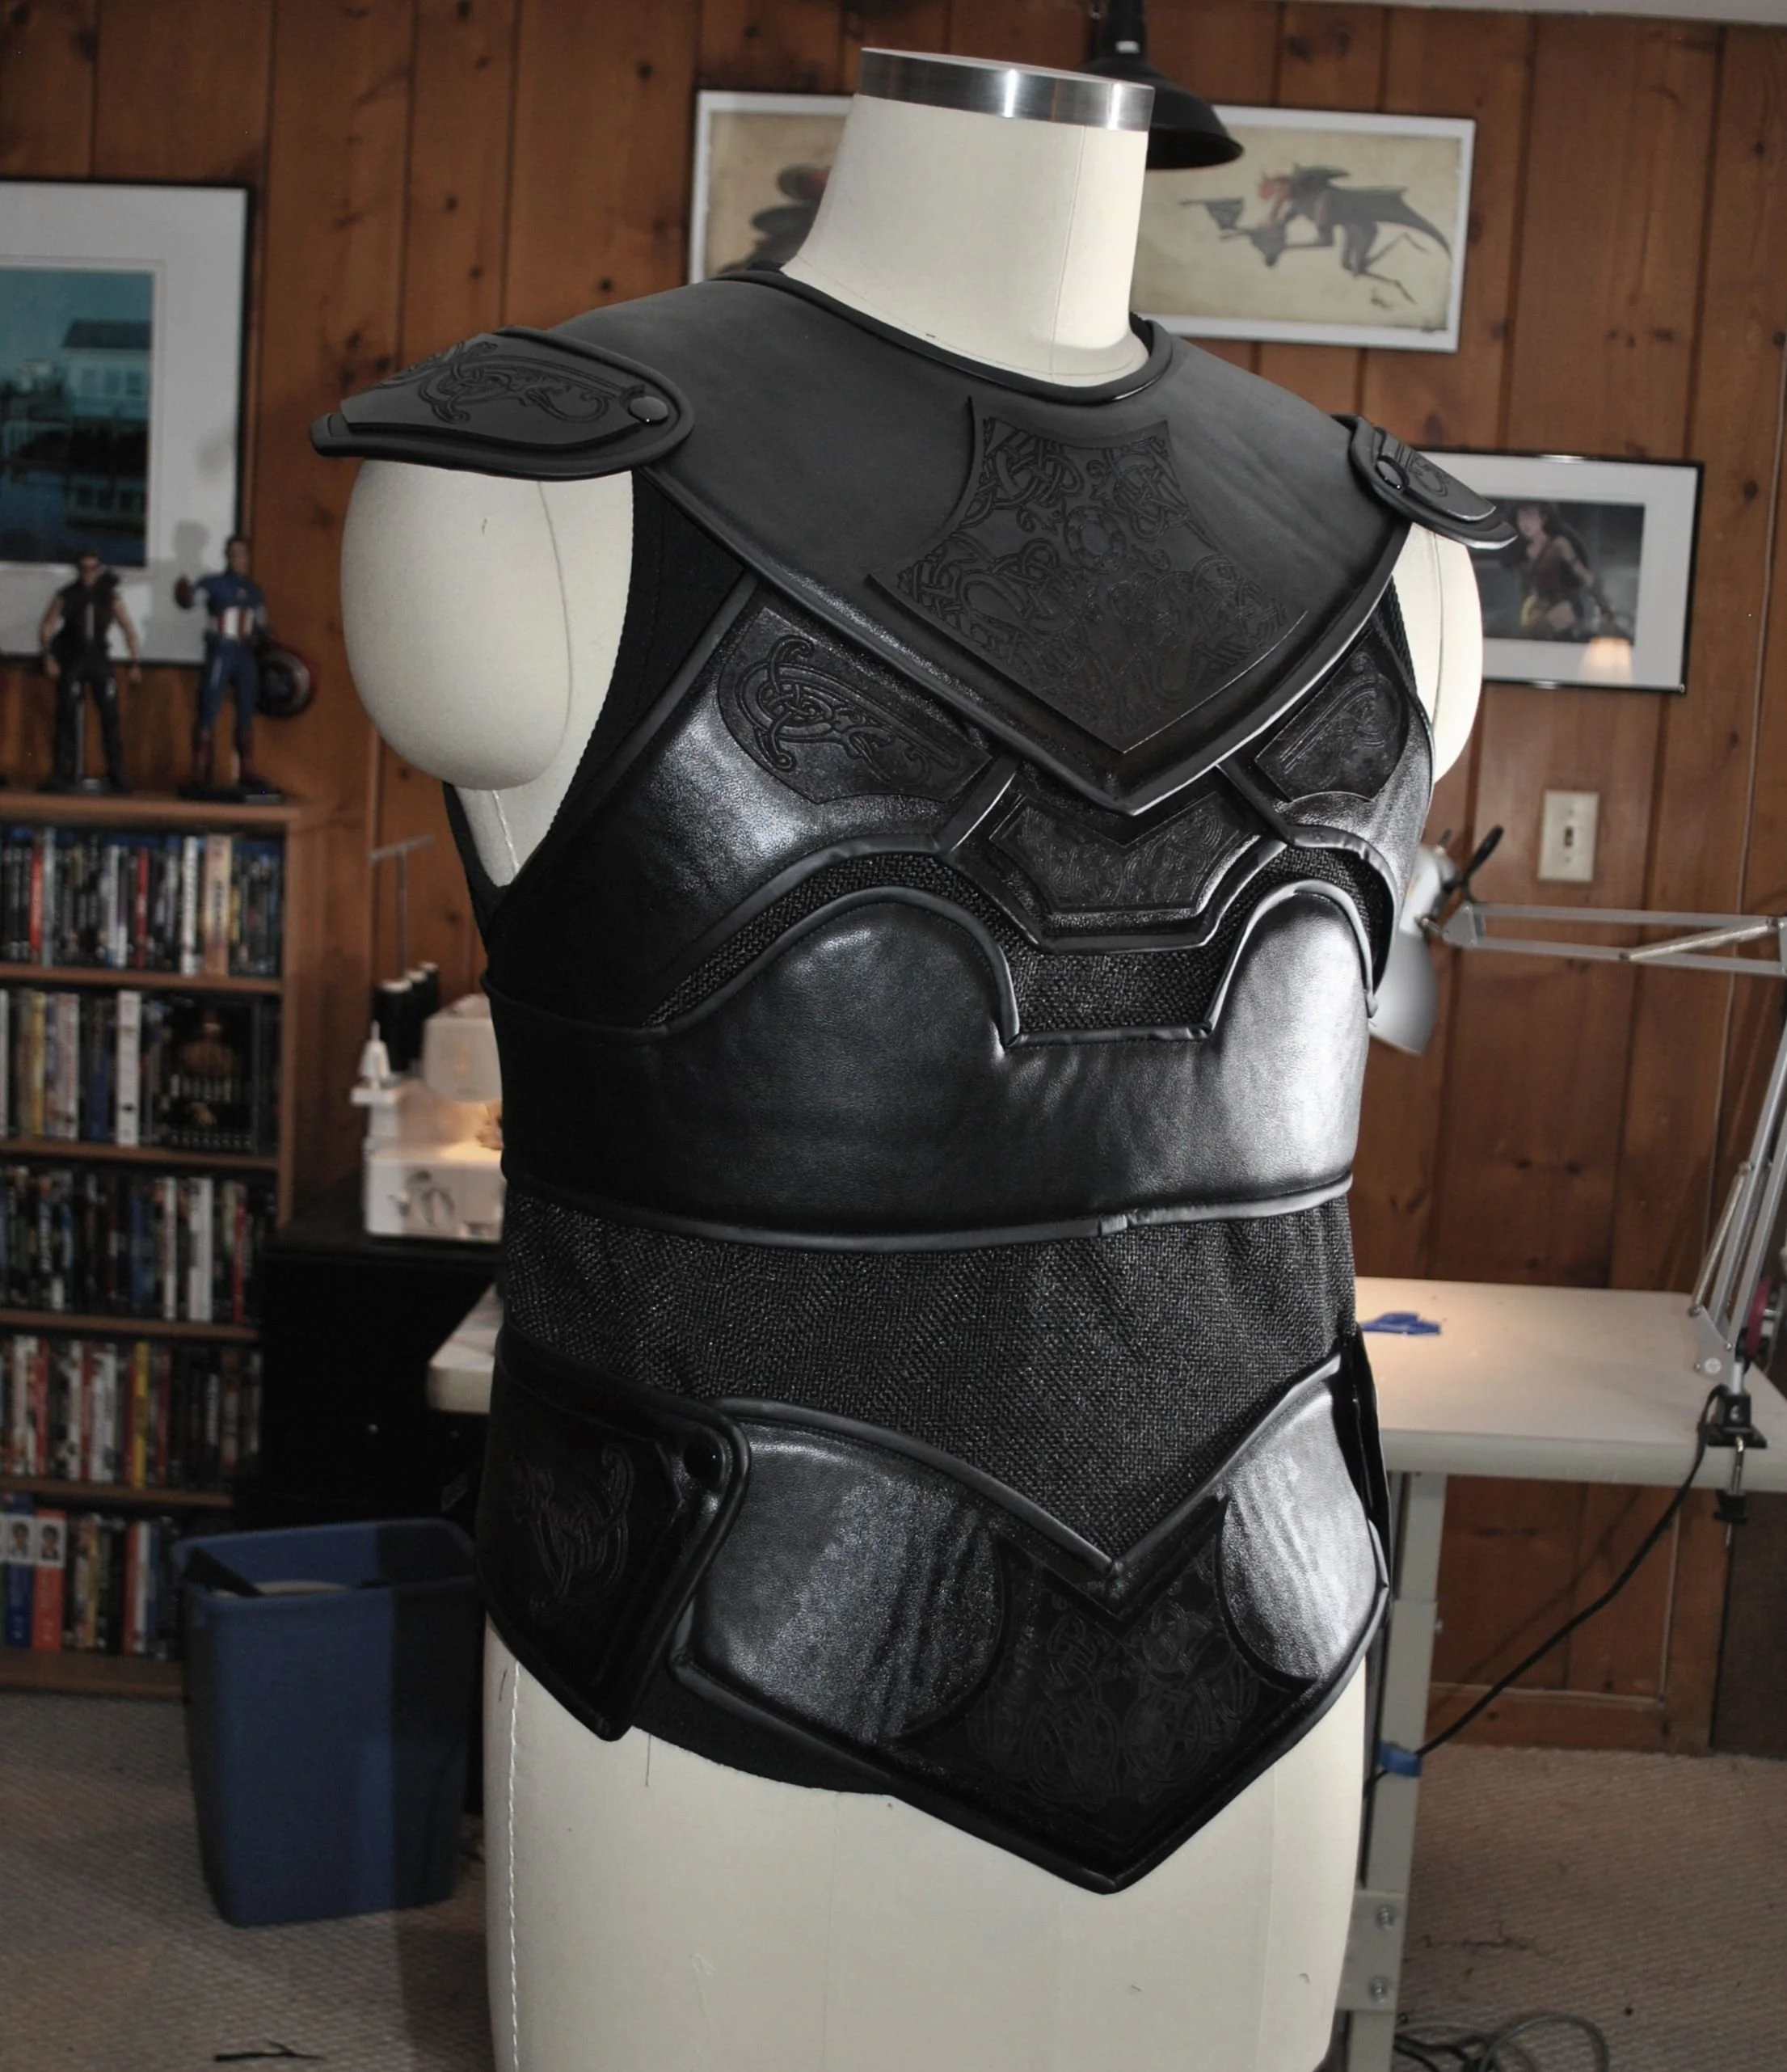
Once the pieces were completed, they were attached and tested on the foundation.


At this point, the laser-etched pieces came in from 2PlayerGame and were perfect. I set about dyeing and finishing them. They were then attached to the armor with contact cement.


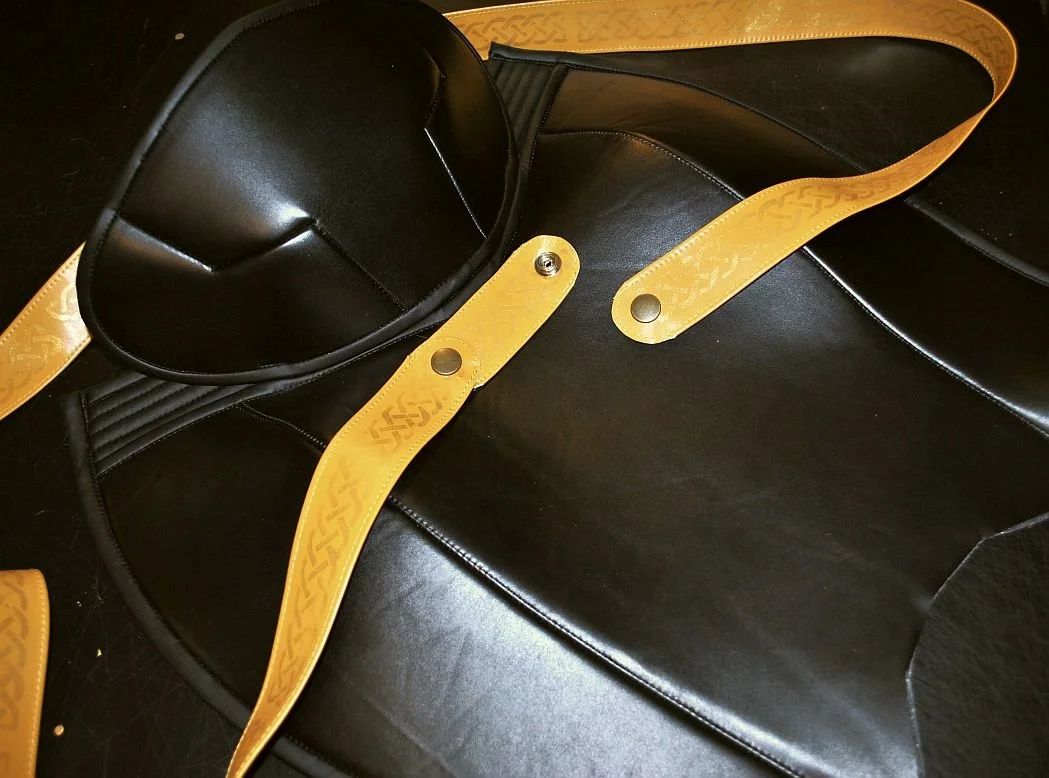
The vest closes in the back with straps and buckles. There is also a sleeveless undershirt of black bullet spandex that will complete the upper body and fill in all the gaps. My goal with this approach was to make the vest adjustable and create a more breathable costume with a better range of motion than a solid torso made of foam and leather.

With the vest complete, I decided to tackle the helmet. I used a base template I designed for Dr Doom and trimmed it down to the profile I wanted. I also drafted the wings to fit the proportions I wanted. I built the base helmet out of 4mm EVA foam and tested the wing template with it.


The helmet was then detailed with 2mm EVA foam strips and ‘rivets’. I wanted the wings to be removable for storage and transit, so I punched holes that would fit with Chicago screws on the wings. The helmet was given an initial coat of Plasti-Dip.


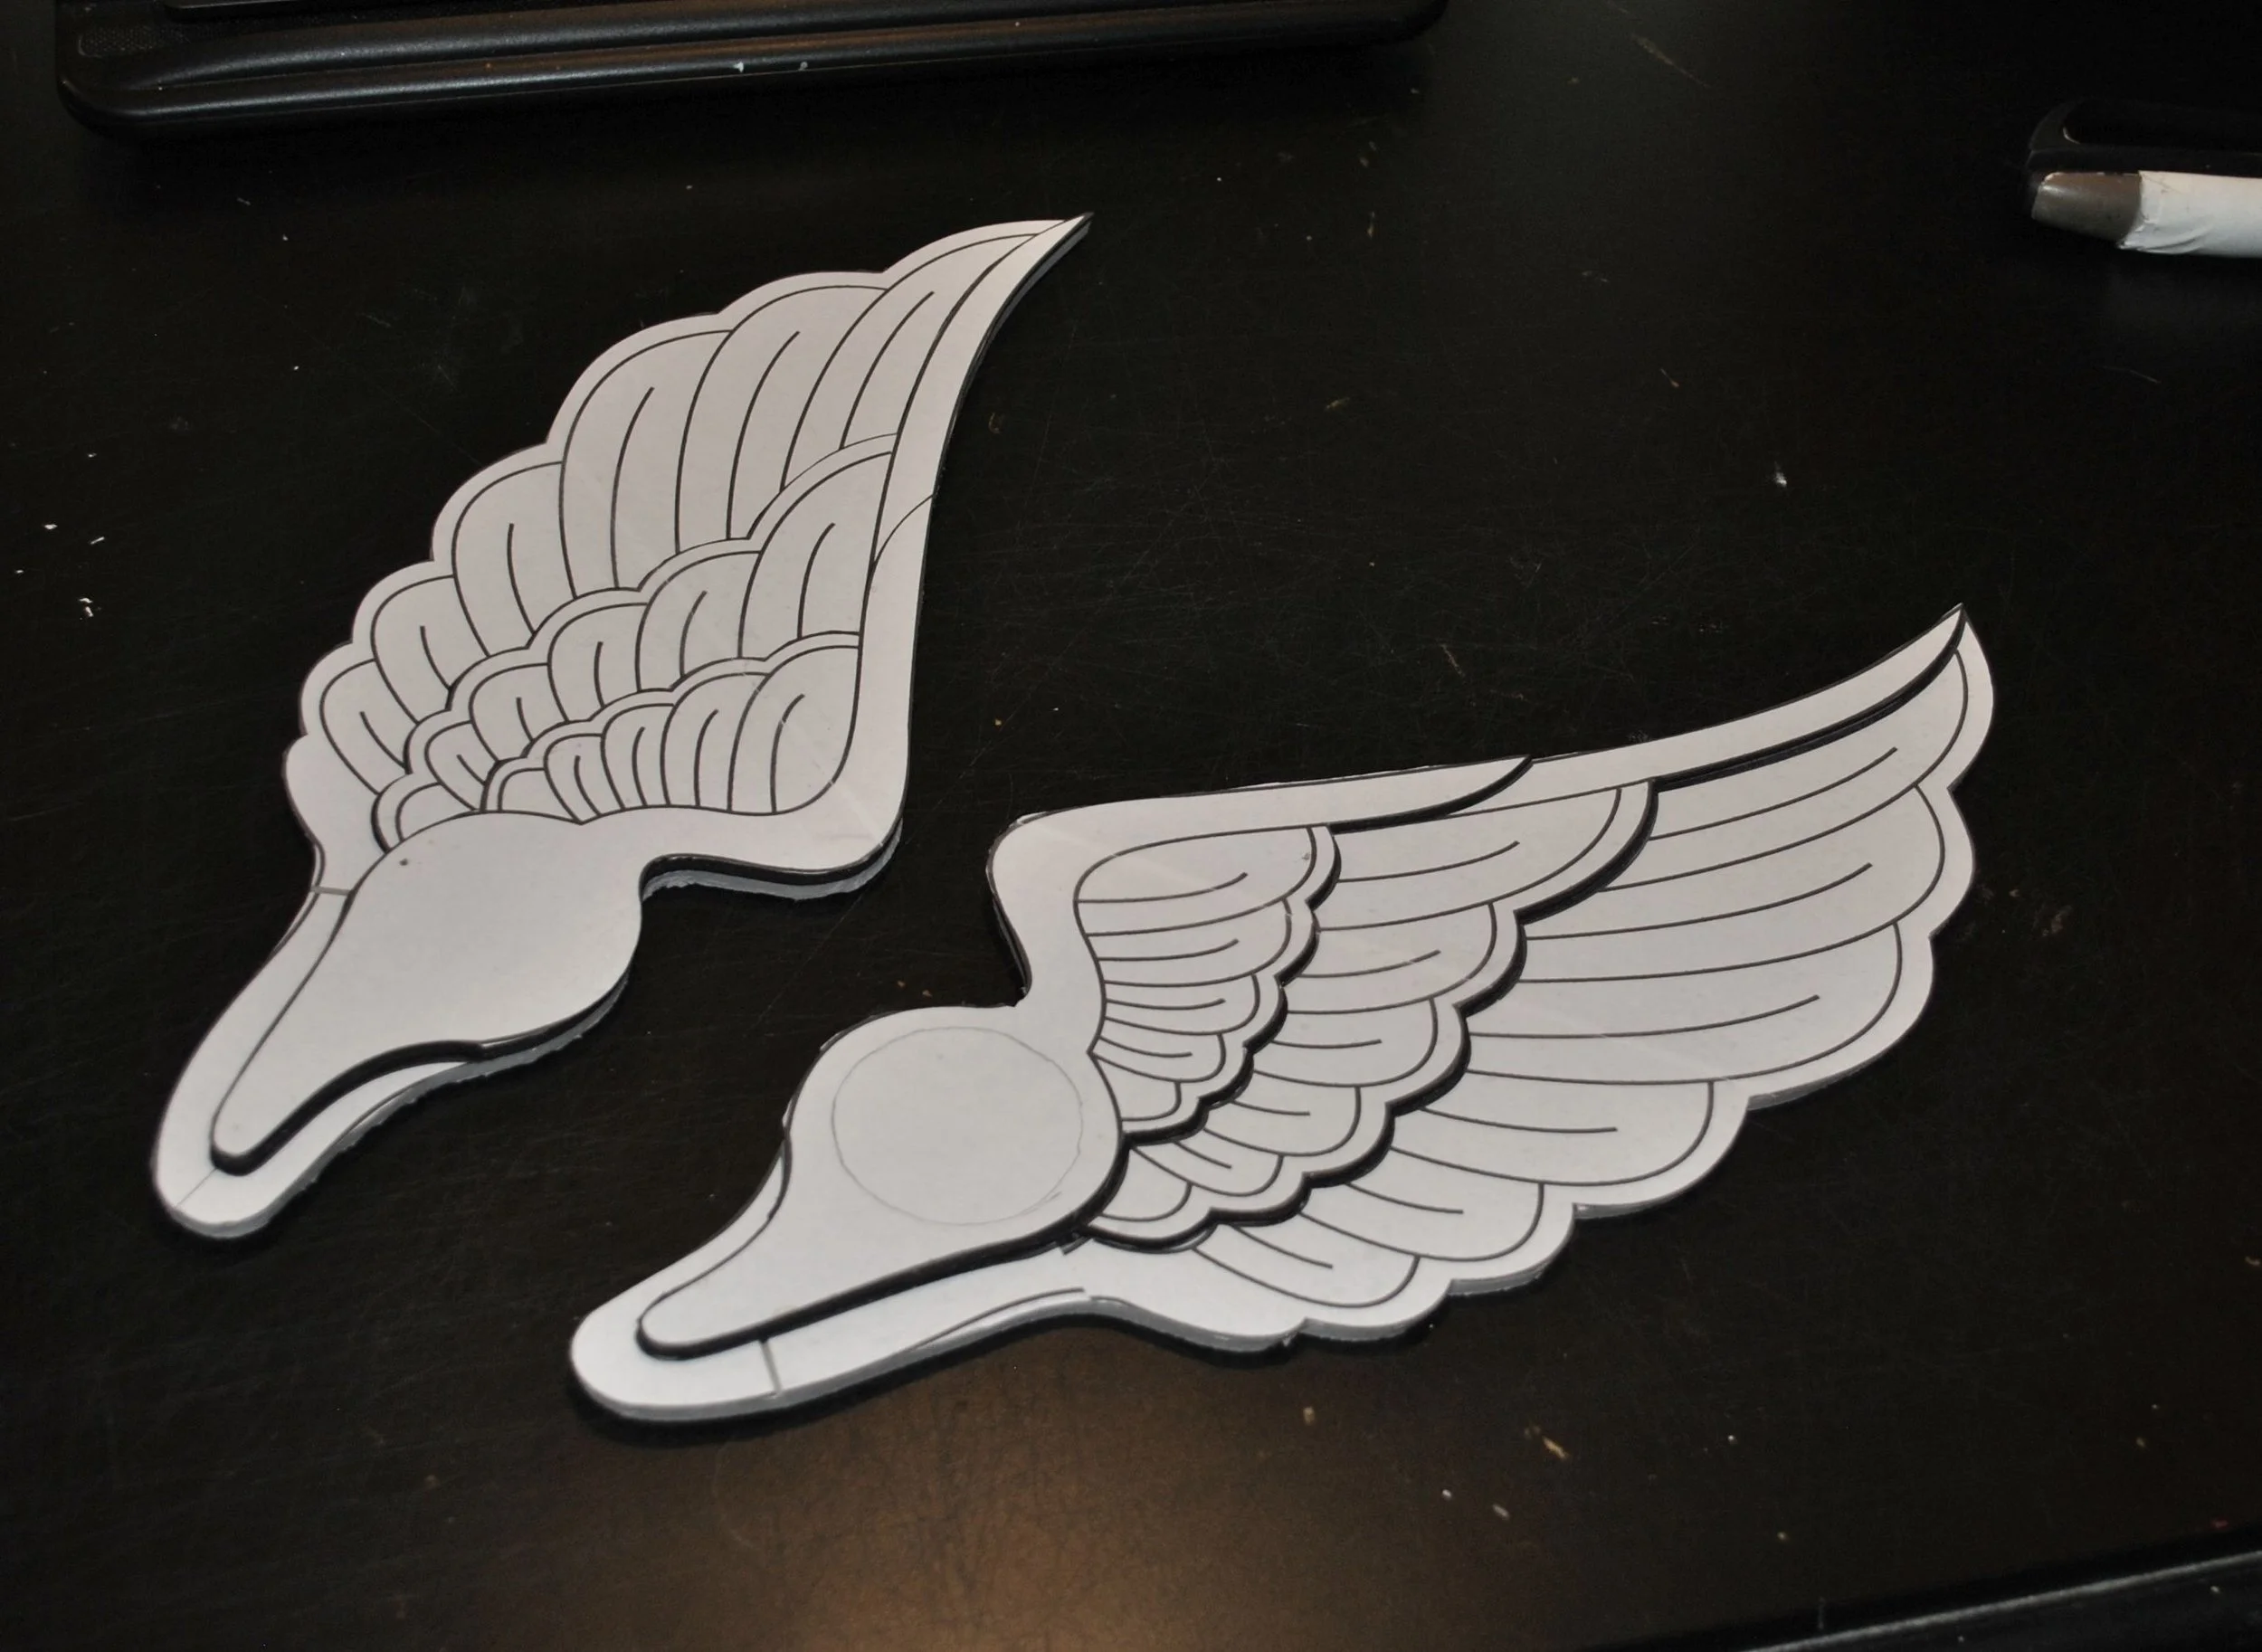
The design for the wings was refined in Inkscape and printed. The wings were constructed in 3mm and 2mm EVA foam layers. The ‘feather’ details were cut into the foam with an X-acto knife, and then a heat gun was used to open the cut lines and create the details. I added some medallions over the ears using foam clay pressed into a mold from my RPG-Rogue build, and all of the pieces were coated in Plasti-Dip.


In the meantime, superdaftbros was at work on the 3d models and prints for the discs and belt buckle based on my vector files. Once he sent the prints, I made a mold using Oomoo 25 and cast them in the lightweight resin I like to use on these projects.
Once cast, the pieces were painted with multiple layers of metallic paints, sponge-detailed, and coated with gloss Dura-clear.


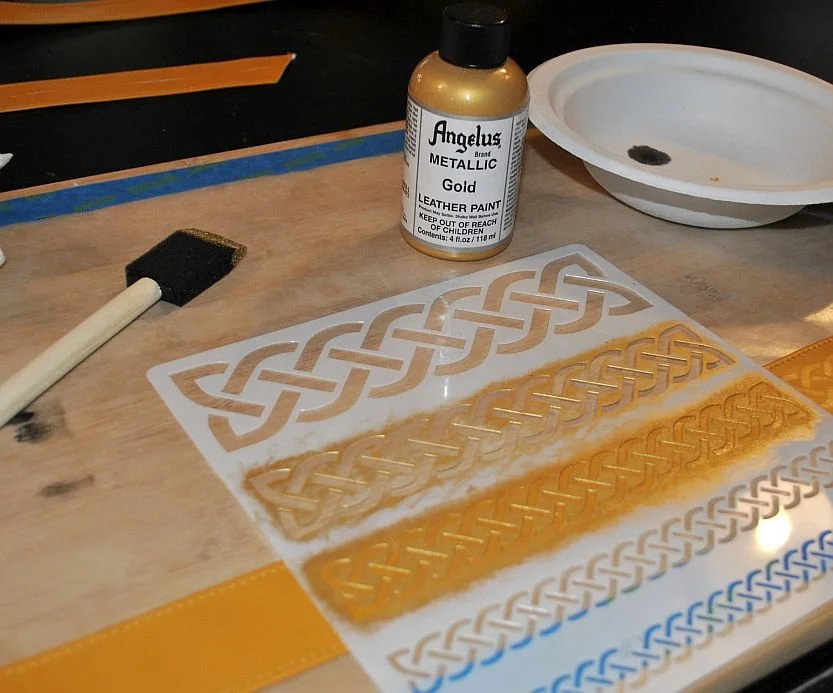
I didn’t get images of the belt being constructed, but it was made of 2mm EVA foam covered with mustard yellow faux leather. I then sponged a knot pattern using a stencil and gold Angelus paint (I’ll cover that later in the boots section).
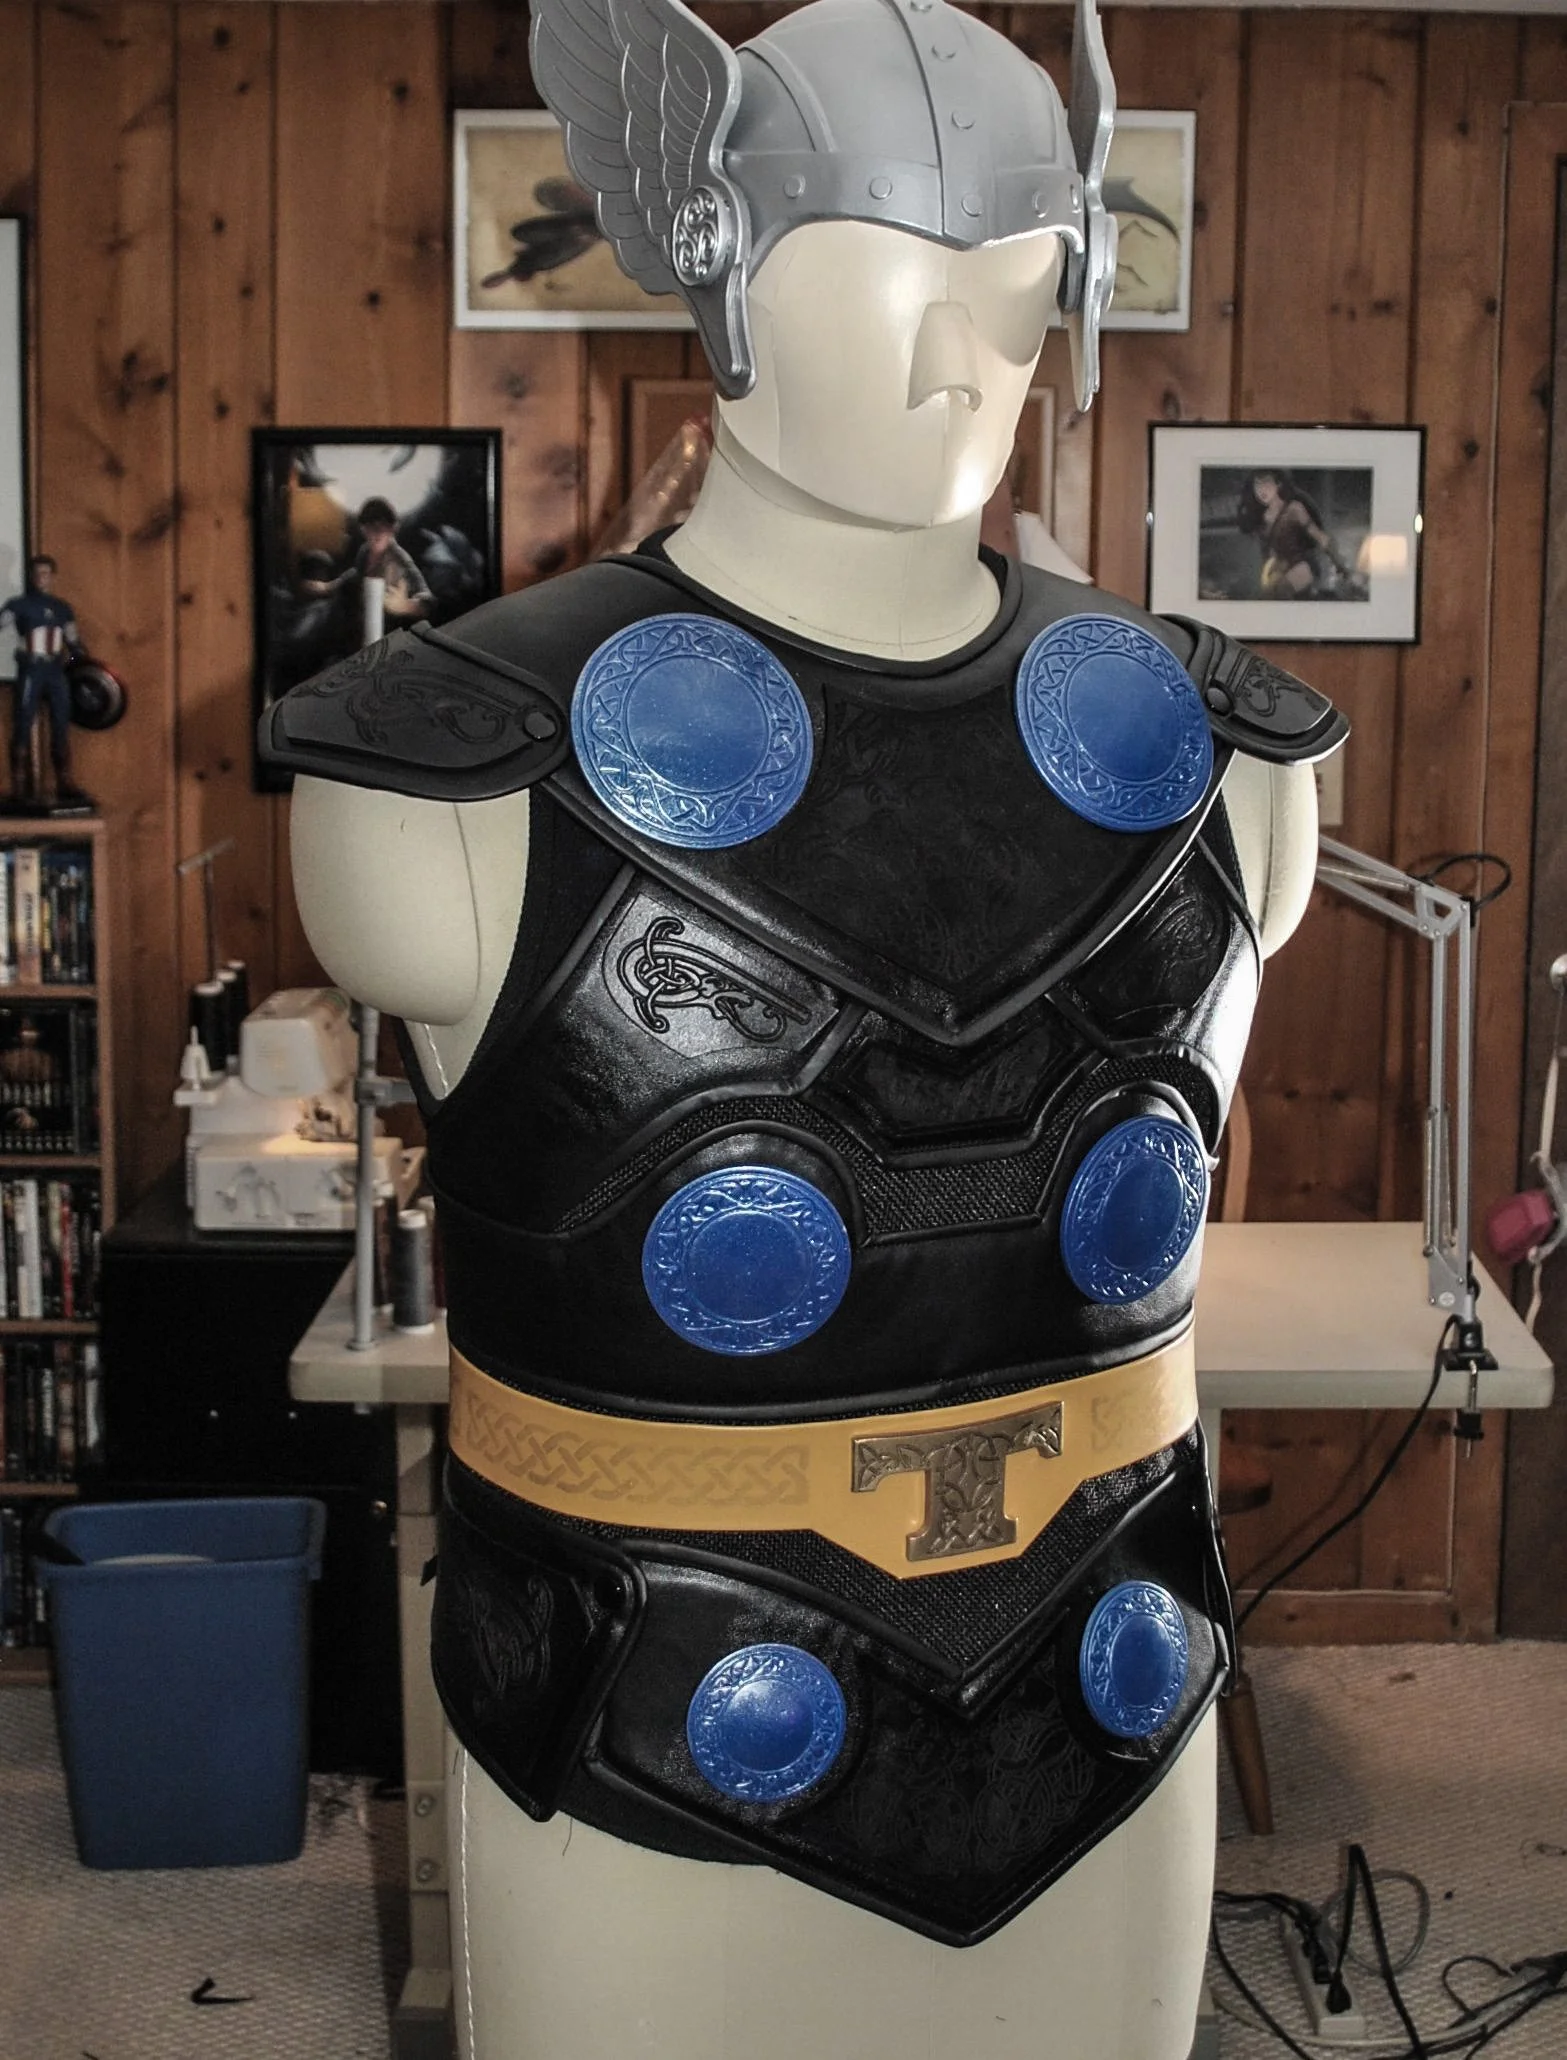
Here are all of the pieces being test fit on the armor.


The next element I wanted to tackle was the cape. The first step in that process was to develop the support piece. My Thor projects (and Dr Doom) have included an EVA foam support for the cape. However, as this is the classic version, I wanted to give the cape a bit more lift over the shoulders and back without getting too cartoony.
I created a base template to fit the armor and cut it from 4mm EVA foam. I then developed a support piece under the main foundation to give it some rise on the shoulders. The fabric cape will be patterned to fit over and encase this foam base.


Next, I needed to create the patterns for the cape. The cape is going to consist of two side pieces that will be permanently pleated over the shoulders, a center back piece with most of the fullness and a yoke piece that connects them all and fits the fabric cape onto the foam base, sort of like a pillowcase goes over a pillow.
Since the foam base for this cape has that stand under it, I knew the yoke would need some particular patterning. I wrapped the foam base in plastic wrap and tape and then cut the yoke pattern. Here you can see the base foam pattern and the yoke pattern showing a significant difference between the two needed to fit properly and maintain the shape.


The main cape pattern pieces were made by folding sheets of craft paper, laying them over the form, drawing out the form shape, and unfolding the paper. The pleats for the back and the turn-under on the sides were added to these paper pieces.
The pleats were then clearly marked on the patterns. The cape pieces were cut from the red poplin used for the piece, and a muslin interlining was added to the pleated sections to give them more structure.


The pleats were then sewn into the cape pieces and tested for fit over the foam base. Once all the pleats were done, the yoke was added to the underside, and the assembled cape was tested for fit on the vest. The cape attaches to the vest with Chicago screws to keep it stable and in place.


The discs for the cape attach with industrial Velcro to cover the Chicago screws.

The helmet was painted next. I used a series of masking off the upper levels of the helmet and wings and combining spray paint and airbrushing to create depth and additional dimension to the pieces.


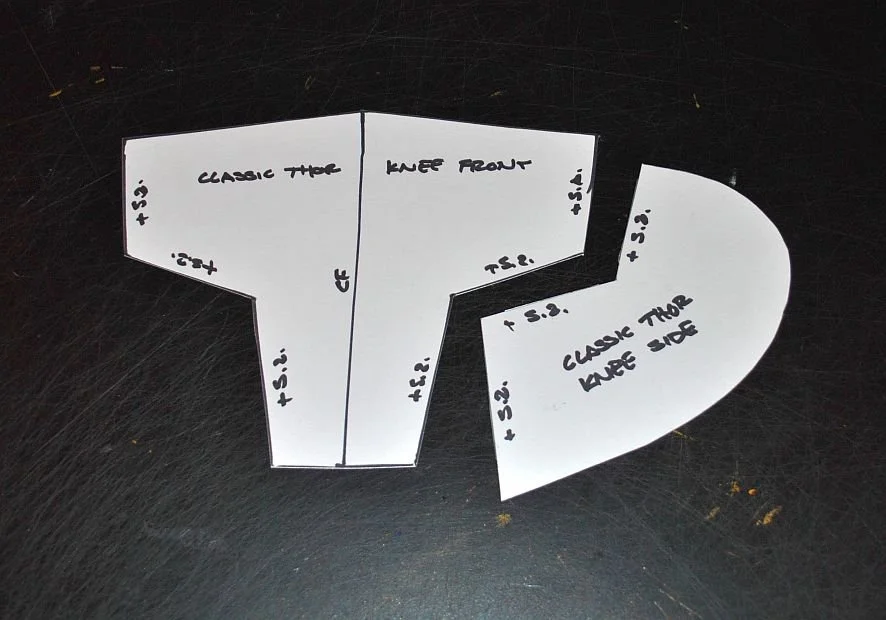
The boots were next. I used one of my base patterns to draw out the patterns for the boot shaft, the shoe and modified knee cap.
The boots are in two pieces - the shoe that comes over the ankle and the shaft and knee that zip up the back and fit over the shoes.

I began with the shoes. I used a mesh slip-on running shoe as the base for the shoes and adjusted the pattern to fit. The shoes were constructed in yellow faux leather backed with headliner foam and featured 2mm EVA foam details on the upper.
The pieces were all assembled and short zippers were added to the back to ease getting them on and off. The top and bottom edges were bound in thin black nylon spandex and the they were then glued to the base shoes where the mesh met the rubber soles.


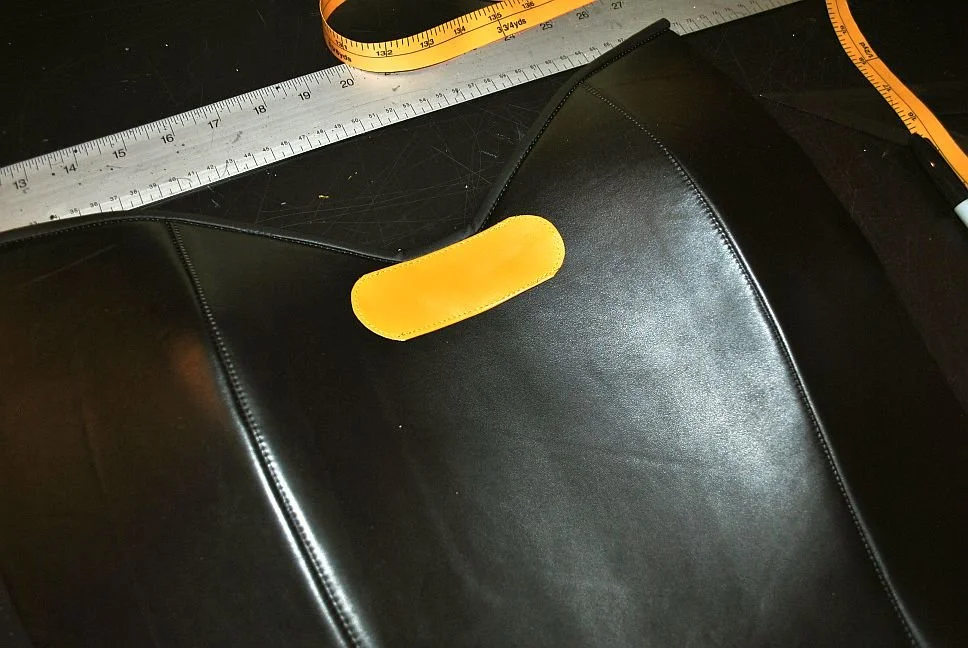
The shafts were then constructed out of medium-weight black faux leather lined with headliner foam. Once assembled, the top and bottom edges were bound in black faux leather and a piece of yellow faux leather was added to the center just below the knee.
This piece of yellow would become the connection point for the ‘wraps’ that encircle the boots from ankle to knee.
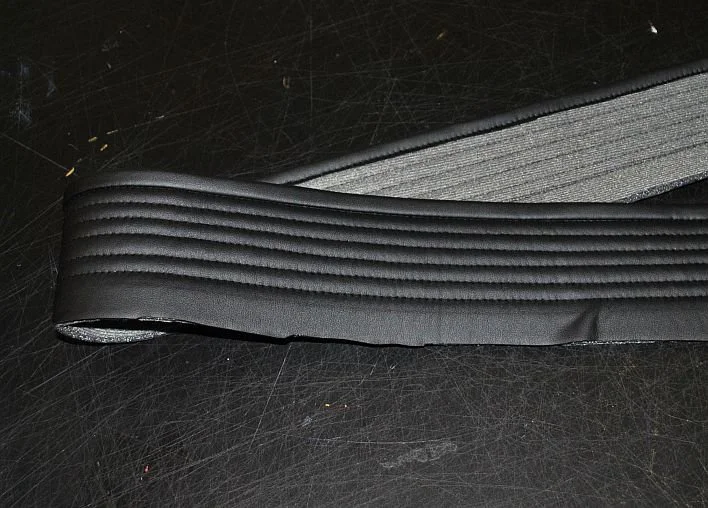
Ribbed bands were attached to the top to add detail and support the knee pad and separating zippers were added to the backs.

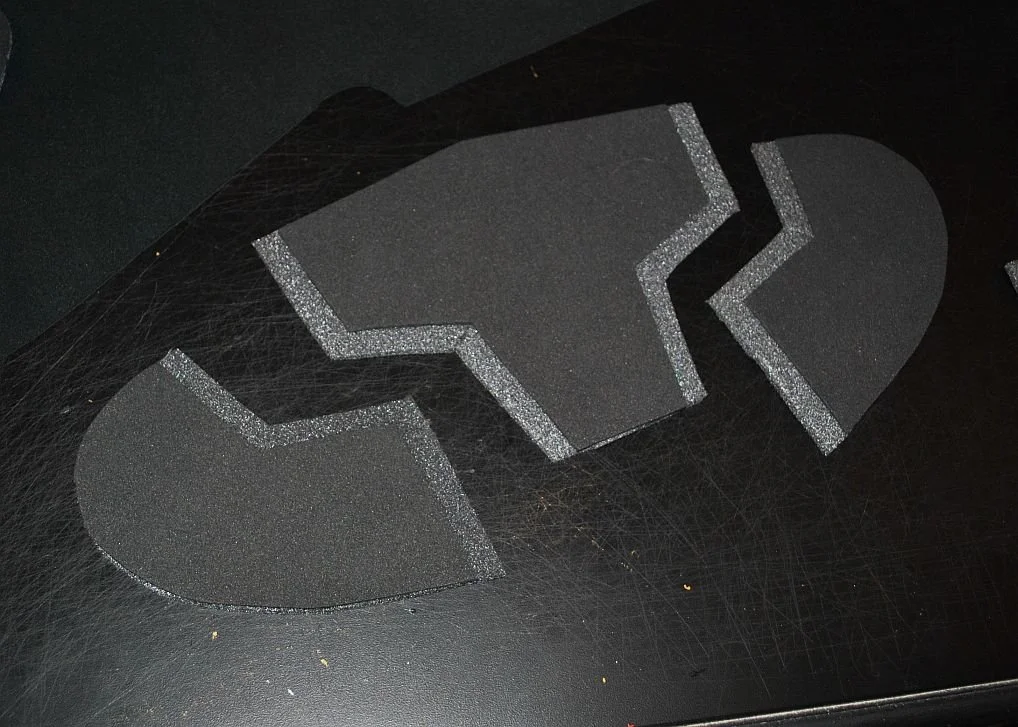
The knee pads were made of black faux leather backed with headline foam and included 2mm EVA foam inserts to provide structure.
At this point, the bands were also made to create the ‘wraps’ for the boots. These straps were detailed with gold Angelus paint and added to the boot shafts. They connect to the backs of the boots at the ankle, wrap around several times and snap to the yellow segment added to the upper front of the boots.
And here are the finished boots.


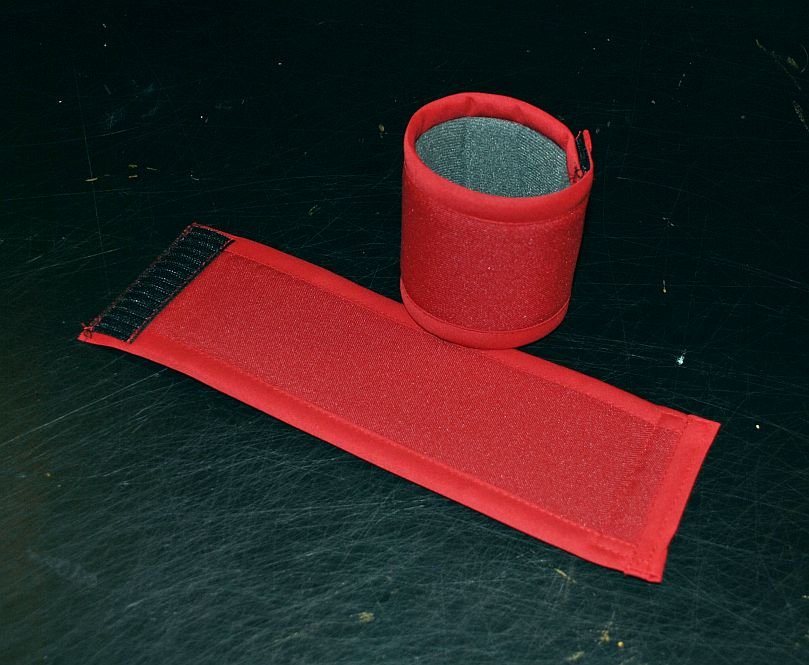
The last of the accessories to create were the wrist cuffs. These were made of the same red fabric as the cape, padded with foam and then black laser-embossed strips were added for detail.