Thor Dark World

It’s another Thor project, and we’re building the Dark World outfit this time. I started by developing the basic shapes for the torso armor.
On this project, I took a little different approach. I had a large-scale action figure in this costume and took a series of pictures of it from all sides. Using these pictures, I created a vector trace in Inkscape of all the torso armor pieces and scaled them roughly to the client’s measurements.


I then printed out these rough templates, tested and altered them, and used them to build a foam mockup. The foam mockup only had the primary design lines and layers to show proportion and scale. The fine details would come later once the fit was finalized.


The mockup was then sent off to the client for a fitting.
After fitting and editing the templates for the needed adjustments, it was time to start the build.
I began by transferring the notes from the fitting onto revised templates. At this point, I also needed to determine the exact order in which the pieces needed to be assembled and make detailed patterns accordingly.
The foundation for the vest armor was headliner foam covered with thin faux leather. The details and “armor plates” were created by layering 2mm EVA foam and slightly thicker faux leather and stitching in the details lines with a cording foot. The edges of all the pieces were bound in thin faux leather.


It was then a matter of working through the torso like a puzzle - deciding the layers that needed to go in a particular order and thinking about how all the materials would fit together with the foam “hardware” that would come later.
The entire process consisted of working on the shapes based on the fitting notes and combining the headliner foam (foundation structure), thin faux leather (also foundation/filler and provides some stretch and flexibility), EVA foam (to create the “plate” dimension), and the heavier faux leather (that gives the “weight” and texture to the armor).


Next, the lower front of the vest was constructed. Like the rest, the lower piece was created by layering EVA and headliner foam and covering them with black faux leather. The details were stitched down, and the edges were finished. This piece was attached to the upper chest with 2” elastic and left free under the rest of the front.
The vest was made this way so the upper chest and lower front pieces could move and shift under the central chest - allowing for a better range of motion and more natural and comfortable wear.


Next up was the back of the vest. The base was assembled from faux leather lined in muslin. The detail pieces for the shoulders and upper back were finalized and layered using EVA and headliner foam covered and edged in faux leather.


Here is the vest at this point.
The lower back pieces where then created using the same method and attached to complete the back of the vest.


The last of the main pieces for the vest was the shoulder yoke and collar. This was patterned to fit and built from headliner foam covered with the same black faux leather used on the rest of the vest.
I also created a stretch “girdle” that attaches to the back of the vest and zips up in the front. This piece keeps the back fitted to the torso and takes much of the stress off the buckles connecting the front at the lower back.


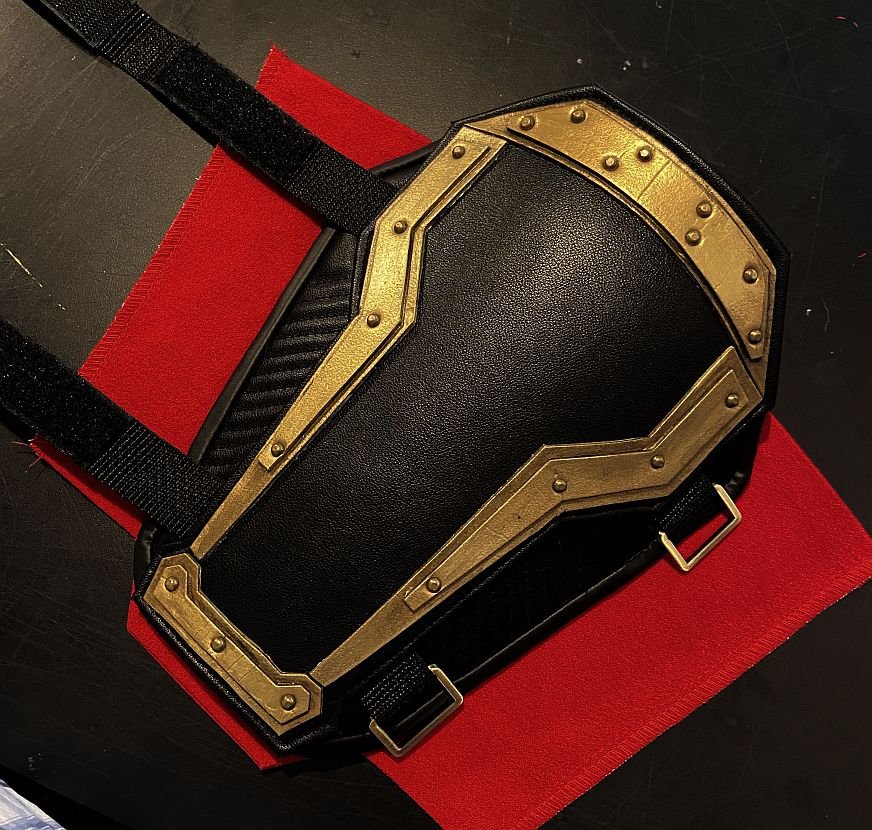
At this point, I was ready to start incorporating all the “hardware”. These pieces were laser cut in EVA foam by 2PlayerGame. I coated all the parts with PlastiDip, sprayed them with a base coat of metallic gold paint, and then hand-painted the details.
Each piece was punched with holes, and rivets were used (as well as glue) to attach them to the vest and accessories. The same rivets were also used to create the decorative details of the rest of the vest.


The cape was next. This piece was built based on the pattern from the Dr Doom build and included an EVA foam insert that created the shape and bulk over the shoulders. I didn’t get images of the cape attachment, but the cape has straps attached under the discs. These straps fit through slots in the vest and clip to a belt that fits under the vest.
The foam discs were heated before coating with PlastiDip to be shaped into shallow domes. They were then painted with the same method as the other foam hardware pieces.


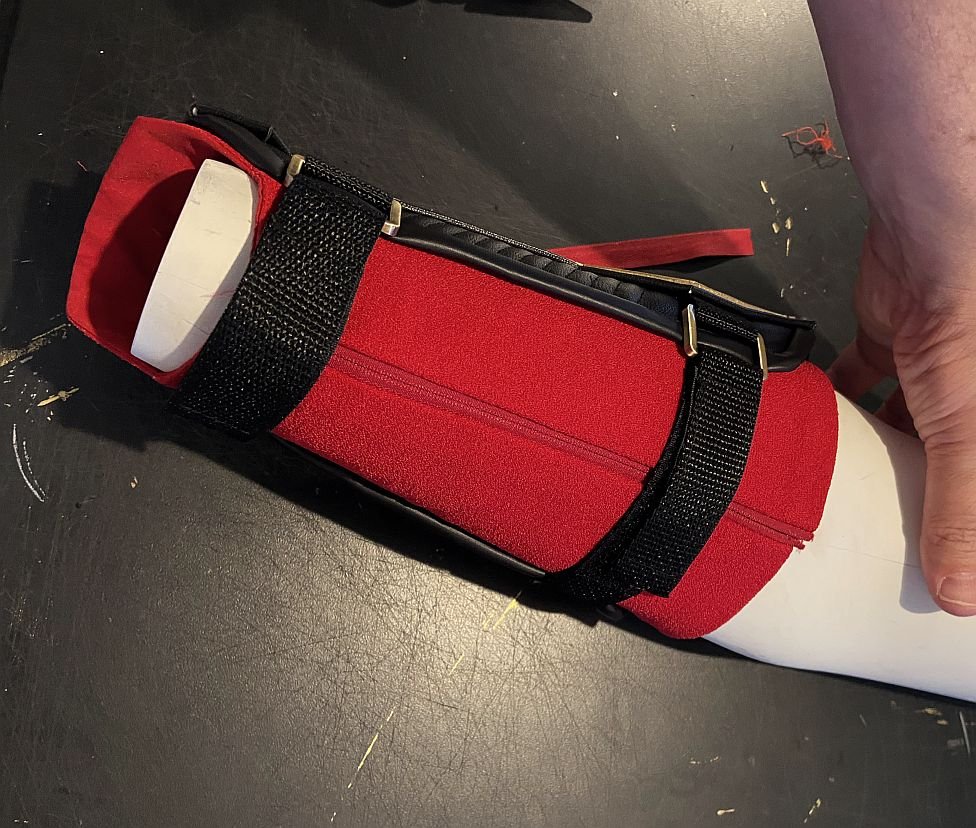
The gauntlets were created using the same fabric as the cape for the base. The armor segments were built like the vest - headliner foam covered in faux leather with stitched details and an upper layer of EVA foam with the same faux leather added to the top. The gold hardware pieces were then riveted on to finish the pieces.


The loincloth was next. This was made using navy blue linen lined with muslin. The front and back tabs were decorated with #10 zipper top stops. The front overlay tabs matched the rest of the vest, and the entire loincloth was designed to be worn as a separate piece over the pants and under the vest. (Note: I did not make the pants - they were sourced and sent to me for alterations and reference to fit the other pieces.)


The boots were the last pieces to make. Paper patterns were developed for the upper boot/shaft and exaggerated knee (considering the foam pieces that had been cut). The boots were made in two parts: the upper boot/shaft that zipped up the back and featured strap details, and the shoe, which was created to fit over an existing sole and glued to the base.


And, here’s the final costume!

