Prince Dastan

In this edition, I'll outline the creation of a Prince Dastan costume from the film version of The Prince of Persia.
The first thing we noticed from our reference images was that the vest leather has a semi-floral embossed pattern. So, while looking around and deciding how best to do that, we found two hides of pre-embossed leather in almost a perfect pattern. The first is the reference image, and the second is the leather we used.


A base pattern for the vest and the overlaying and interlocking pieces were drafted to fit that all were cut from the leather. The back was drafted similarly, with the primary upper part having a base layer, as well as the embossed leather and the lower sections cut out to be riveted together.


The pieces were all riveted together, the edges burnished, and the entire piece hand-dyed. We found some belt blanks that were a good color match for the vest, so we beat those up and used them for the two vest belts, the back straps, and the straps that hold it all together.


The vest goes over the head and closes using two 'plates' on the shoulder, and the lower ‘belts’ tie in the back with leather lacing.
Worbla was used to create the shoulder plates. Those were then riveted to the back, and Chicago screws were used to secure the front. At this point, Worbla was also used to create the collar band, which was riveted to the vest. We sculpted and baked a Sculpey stamp to create an embossed motif around the Worbla bands. The Worbla bands were then gently heated, embossed with the stamp, and further detailed with a simple butter knife.

We did a test fit at this point to ensure the vest was going to work before creating all the decorations.


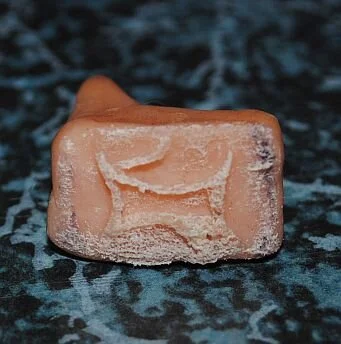
The next things to attend to were the other decorations on the vest. We decided the best route for the small pieces was to sculpt them in Sculpey, bake them off, pull molds, and cast them in resin. We tackled the large center medallion first.
The actual piece is very intricate. Rather than try to sculpt the whole thing, I found a nice medallion on Amazon that was a good size and thought it would be a great starting point. We used this as the main detail of the piece and then sculpted the rest around it.
The images below show the film reference (left) and the base we used (right).


For all the little tiles around the bottom of the vest, we only sculpted three different versions and kept casting them until we had enough. Same for the two pieces on the middle belt on the vest and the buckles for the belts that go around the sash.
We used furniture tacks stuck into the Sculpey before baking on several of the pieces. To create the filigree patterns on the backgrounds of the gauntlet pieces, we found an embossed coat button and just pressed it into the Sculpey like a stencil. Everything else was sculpted by hand using modelling tools.
To save mold-making and materials, all of the pieces for the gauntlets were also hand sculpted, baked and prepped for molding. The molds were made using SmoothOn Vytaflex 30.


At this point, the vest pieces were painted and attached. The bands surrounding the central medallion and edge of the ribs were created the same way as the collar - Worbla was cut, contact cemented to the leather, and then heat embossed and detailed.
Also, due to weight and stress from movement, we didn’t think gluing was appropriate for the central medallion. So, that piece is separate from the vest. It is attached via 4 Chicago screws embedded into the back of the medallion that push through the front of the vest and bolt down from the inside.


With the main pieces well on the way, it was time to move on to the accessories.
We began with the left arm. Having the pieces already cast, the rest of the gauntlet was made using a combination of faux and genuine leather and padded with headliner foam for comfort. Once the base pieces were assembled, the cast and painted pieces were epoxied on and finished with grommets and laces.
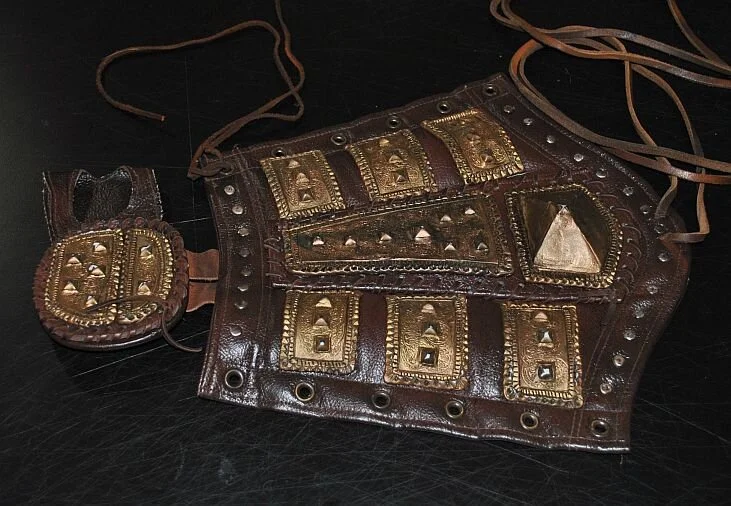


The right arm gauntlet was also made of faux leather backed with headliner foam. This piece also incorporated two different purchased embellishments - small medallions with a compass motif and metal 'acorn' beads.
The three main components - the bicep, elbow and forearm - were linked with leather straps and the inside of the bicep was fitted with an elastic strap. This strap was cut slightly smaller than the shell. The strap would stretch when the piece was laced around the arm and grip the skin, thereby preventing the bicep piece from falling during wear.


Next, I got the pants and waist sash together. The pants are brushed cotton with accents made of rough woven silk. The pants cross over in the front and close at the waistband. The sash is heavy linen that we dyed to make it look distressed.
This was also the point to finish off the two lower belts Dastan wears across the sash. The sculpts and molds for these buckles were created at the same time as all the other findings and were cast in resin, painted, and attached to leather belt blanks. These belts (as in the original costume) tie in the back with leather cords.


And here is the completed outfit.


