Tactical Style Batsuit

I was contacted by a client who wanted a version of a Batman suit based on some of the recent video game versions and built similarly to some of the latest costumes I’ve posted. For reference, we focused primarily on the Arkham Origins and Arkham Knight suits.
Using these images as my primary reference, I was able to work up a rendering for the base pieces. The general idea is to have three pieces that all fit together to create the entire suit while allowing great freedom of motion and maneuverability.


The primary fabrics for this project were Cordura, jumbo spandex, and 1/8” headliner foam.
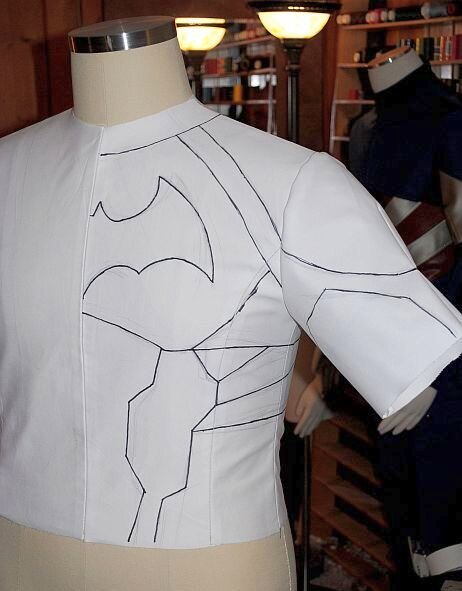
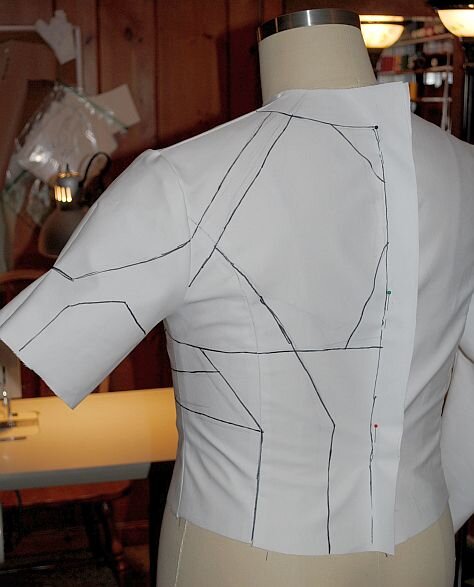
With the general design decided, it was time to work on the pattern. A sloper (a basic pattern that fits the measurements and shape of the design) was used to create a blank torso. The specific pieces were then sketched on the blank to determine the seam lines and create the pattern.
Next, the sketched-out mock-up was cut apart, and the pieces were transferred to paper to create the cutting pattern.
Most of the non-stretch pieces were lined with fabric-backed foam, frequently referred to as headliner (because it's used to cover the ceilings of cars). Some of the pieces have multiple layers of foam to create sculptural effects.
The abs, for instance, were cut as an entire piece of headliner, and then each individual section was cut and spray mounted onto the base.
Next, a piece of Cordura was cut and spray mounted to the front to tack it into place and show the foam levels.
The entire piece was basted around the outside at the seam allowance, and the details were top-stitched around each segment. The excess Cordura was cut away, and the foam was trimmed away from the seam allowance to form an ab section with the needed levels of definition.


For anyone who's not familiar with doing this, here are a few tips on working with headliner foam and angular patterns:
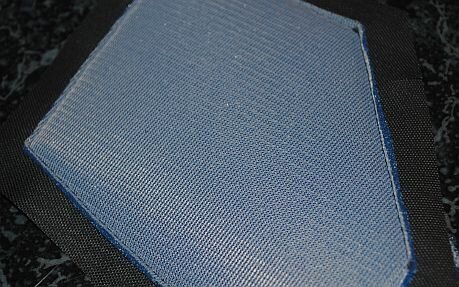
First, I find it best to cut the piece from the foam and cut the fabric larger. On the fabric-backed side of the foam, mark dots at all the corners of the stitching line. The key here is when you baste the foam to the fabric, you want the basting line to be right on the final stitching line. Marking the corners makes it easy to be very precise.
Baste the foam to the fabric with the fabric toward the bobbin and follow your markings all the way around.
Once basted down, trim the excess fabric to the size of the piece and then (carefully!) trim the foam away from the seam allowance. This will keep the seams from being overly bulky with all that extra foam.
For inside angles, go ahead and clip to the point where the stitching will turn the corner. Here's where having all those markings starts to come in really handy.
It's generally easiest to stitch angles like this with the inside angle (the clipped one) on top. Match up the dots, stitch to the point, and put the needle down right through the dot. Lift the presser foot and rotate the fabrics, so you line up the next part of the seam and stitch it down the rest of the way. You should carefully line up the basting stitches and sew right on top of them. This is where being accurate with the basting is essential. When you turn it out, you'll have nice crisp angled seams.
Here are all the Cordura pieces for the torso assembled and laid out. The shoulders, chest, abs, and ribs are all foam-lined. The sides are just lined with heavy cotton.


I also decided to make a test version of the symbol to check proportion. It's bevel cut from 2mm EVA foam and Plasti-Dipped.


It was coming along, but there were a few things I wanted to revisit before assembling all the stretch areas.
The chest needed some more pattern work. I moved the seams a bit farther out to the sides, altered the shape of the bottom a bit, and changed the construction process a little to make the seams more streamlined and less "puffy". The abs also needed adjustment. They were slightly too narrow, and I wanted to revisit the stitching to make it more even and precise.
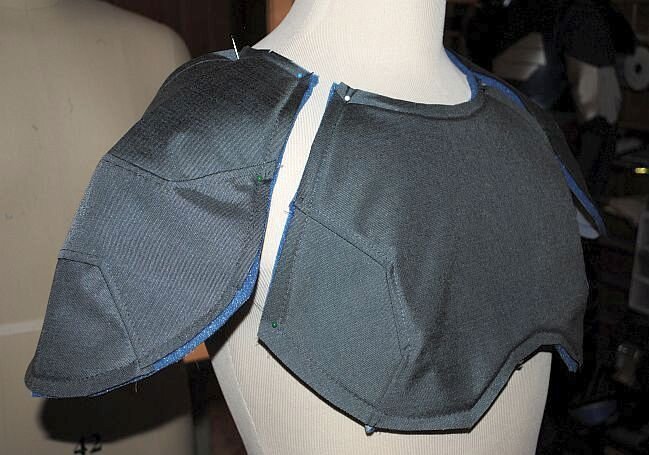
Revisiting the chest, I adjusted the seams to be slightly wider on the piece. I also made the shell and the pad separate. Then, the two were basted together to make the seams crisper and less obtrusive. I also decided to revamp the shoulders similarly and gave them the same angled seam treatment.
Next, I moved on to the abs. I adjusted the pattern to make them wider. I also decided that, rather than trying to stitch around each individual segment, I'd pull in more of the seam detail and then let the pad just do its work underneath without forcing it.
The dark grey stretch areas began going in at this time as well. Here are the abs, the front stretch panel, and one rib/side section complete. Also, the same pieces with the chest and shoulder laid out on top, and all of the pieces so far on the form.


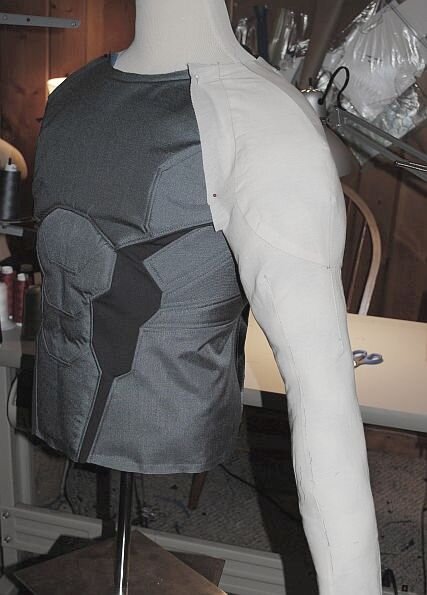
After talking with the client, we decided to take this in a little different direction. Rather than making the top in two pieces (a 'jacket' and undershirt), it became one piece. So, after some on-the-fly modifications to the pieces that were already made, I was able to combine them together.


Next, I began drafting the sleeves. I started by creating a full-length base pattern from the original mock-up. Once that was assembled, I added some shaping to create a more sculptural design for the final patterns. The photo is a bit washed out, but you can see where the shoulder bell will fit into the final sleeve. The overall form has been refined, and the pattern was cut apart and traced onto paper.

All of the Cordura pieces for the sleeves were made first. The biceps and triceps were padded with the same foam as the chest and abs, and the forearm pieces were lined with heavy cotton. Once all of those were complete, the stretch pieces were cut, and all of the pieces were assembled. Here's the sleeve flat with the shoulder added.


For the emblem, I turned to my friend at Jordan's Ironic Armory and he sent me one of his urethane rubber casts. The style was perfect, and the size made the chest look broad and impressive.

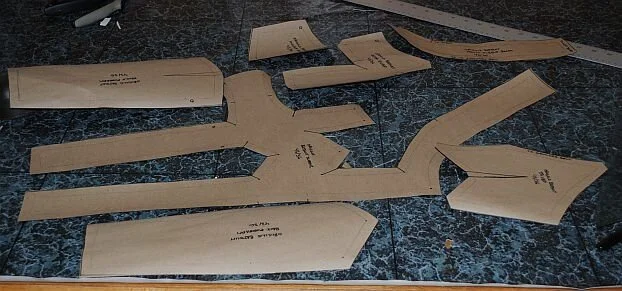
I then moved on to the pants. The pattern for the pants was made in the same manner as the top. I created a base pattern in muslin, measured and added in darts and shaping to make them more sculptural and form-fitting. I then drew on the new seam lines, cut them apart, and transferred the new patterns to paper.
The thigh and the outer calf areas were constructed in the same manner as the arms and chest. The individual pieces were lined with the headliner foam and stitched together, and the stretch areas were added. For ease of wear and to keep the bulk down, the center front, center back, and knee/inner calf areas were not padded. Here are pictures of the upper and lower leg sections laid flat during construction.


Here are the pants before final alterations and finishes.


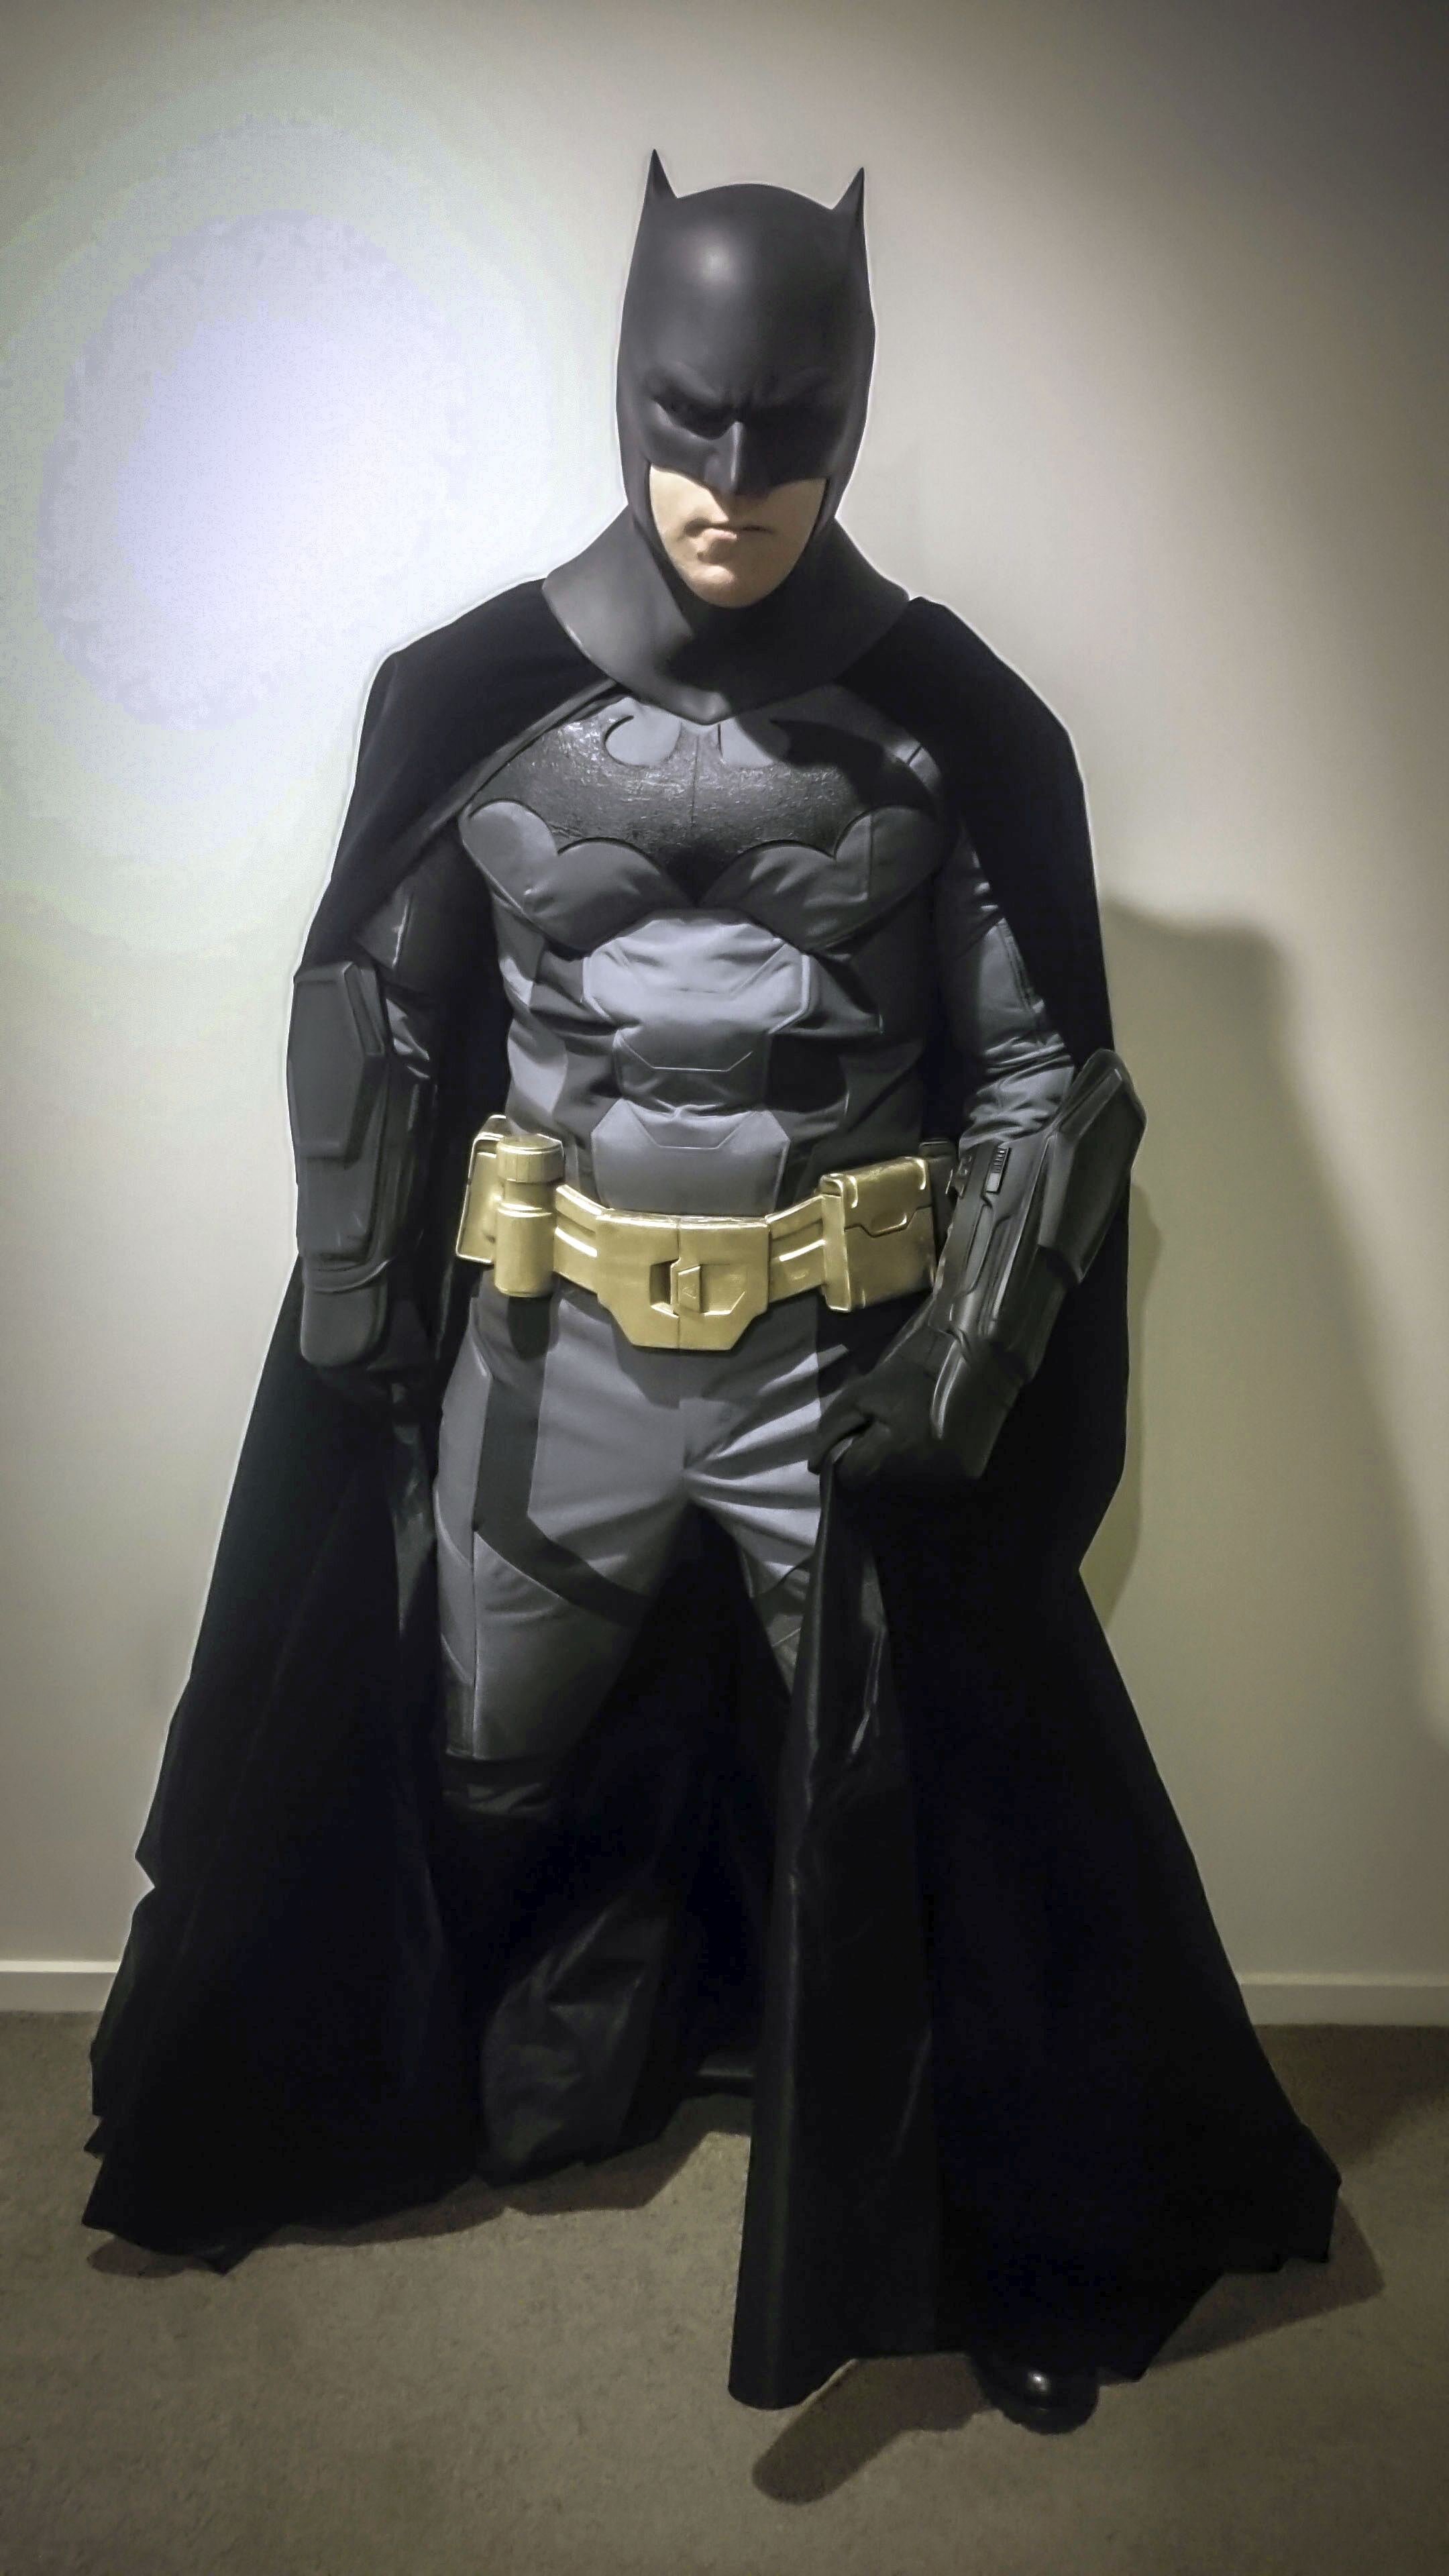
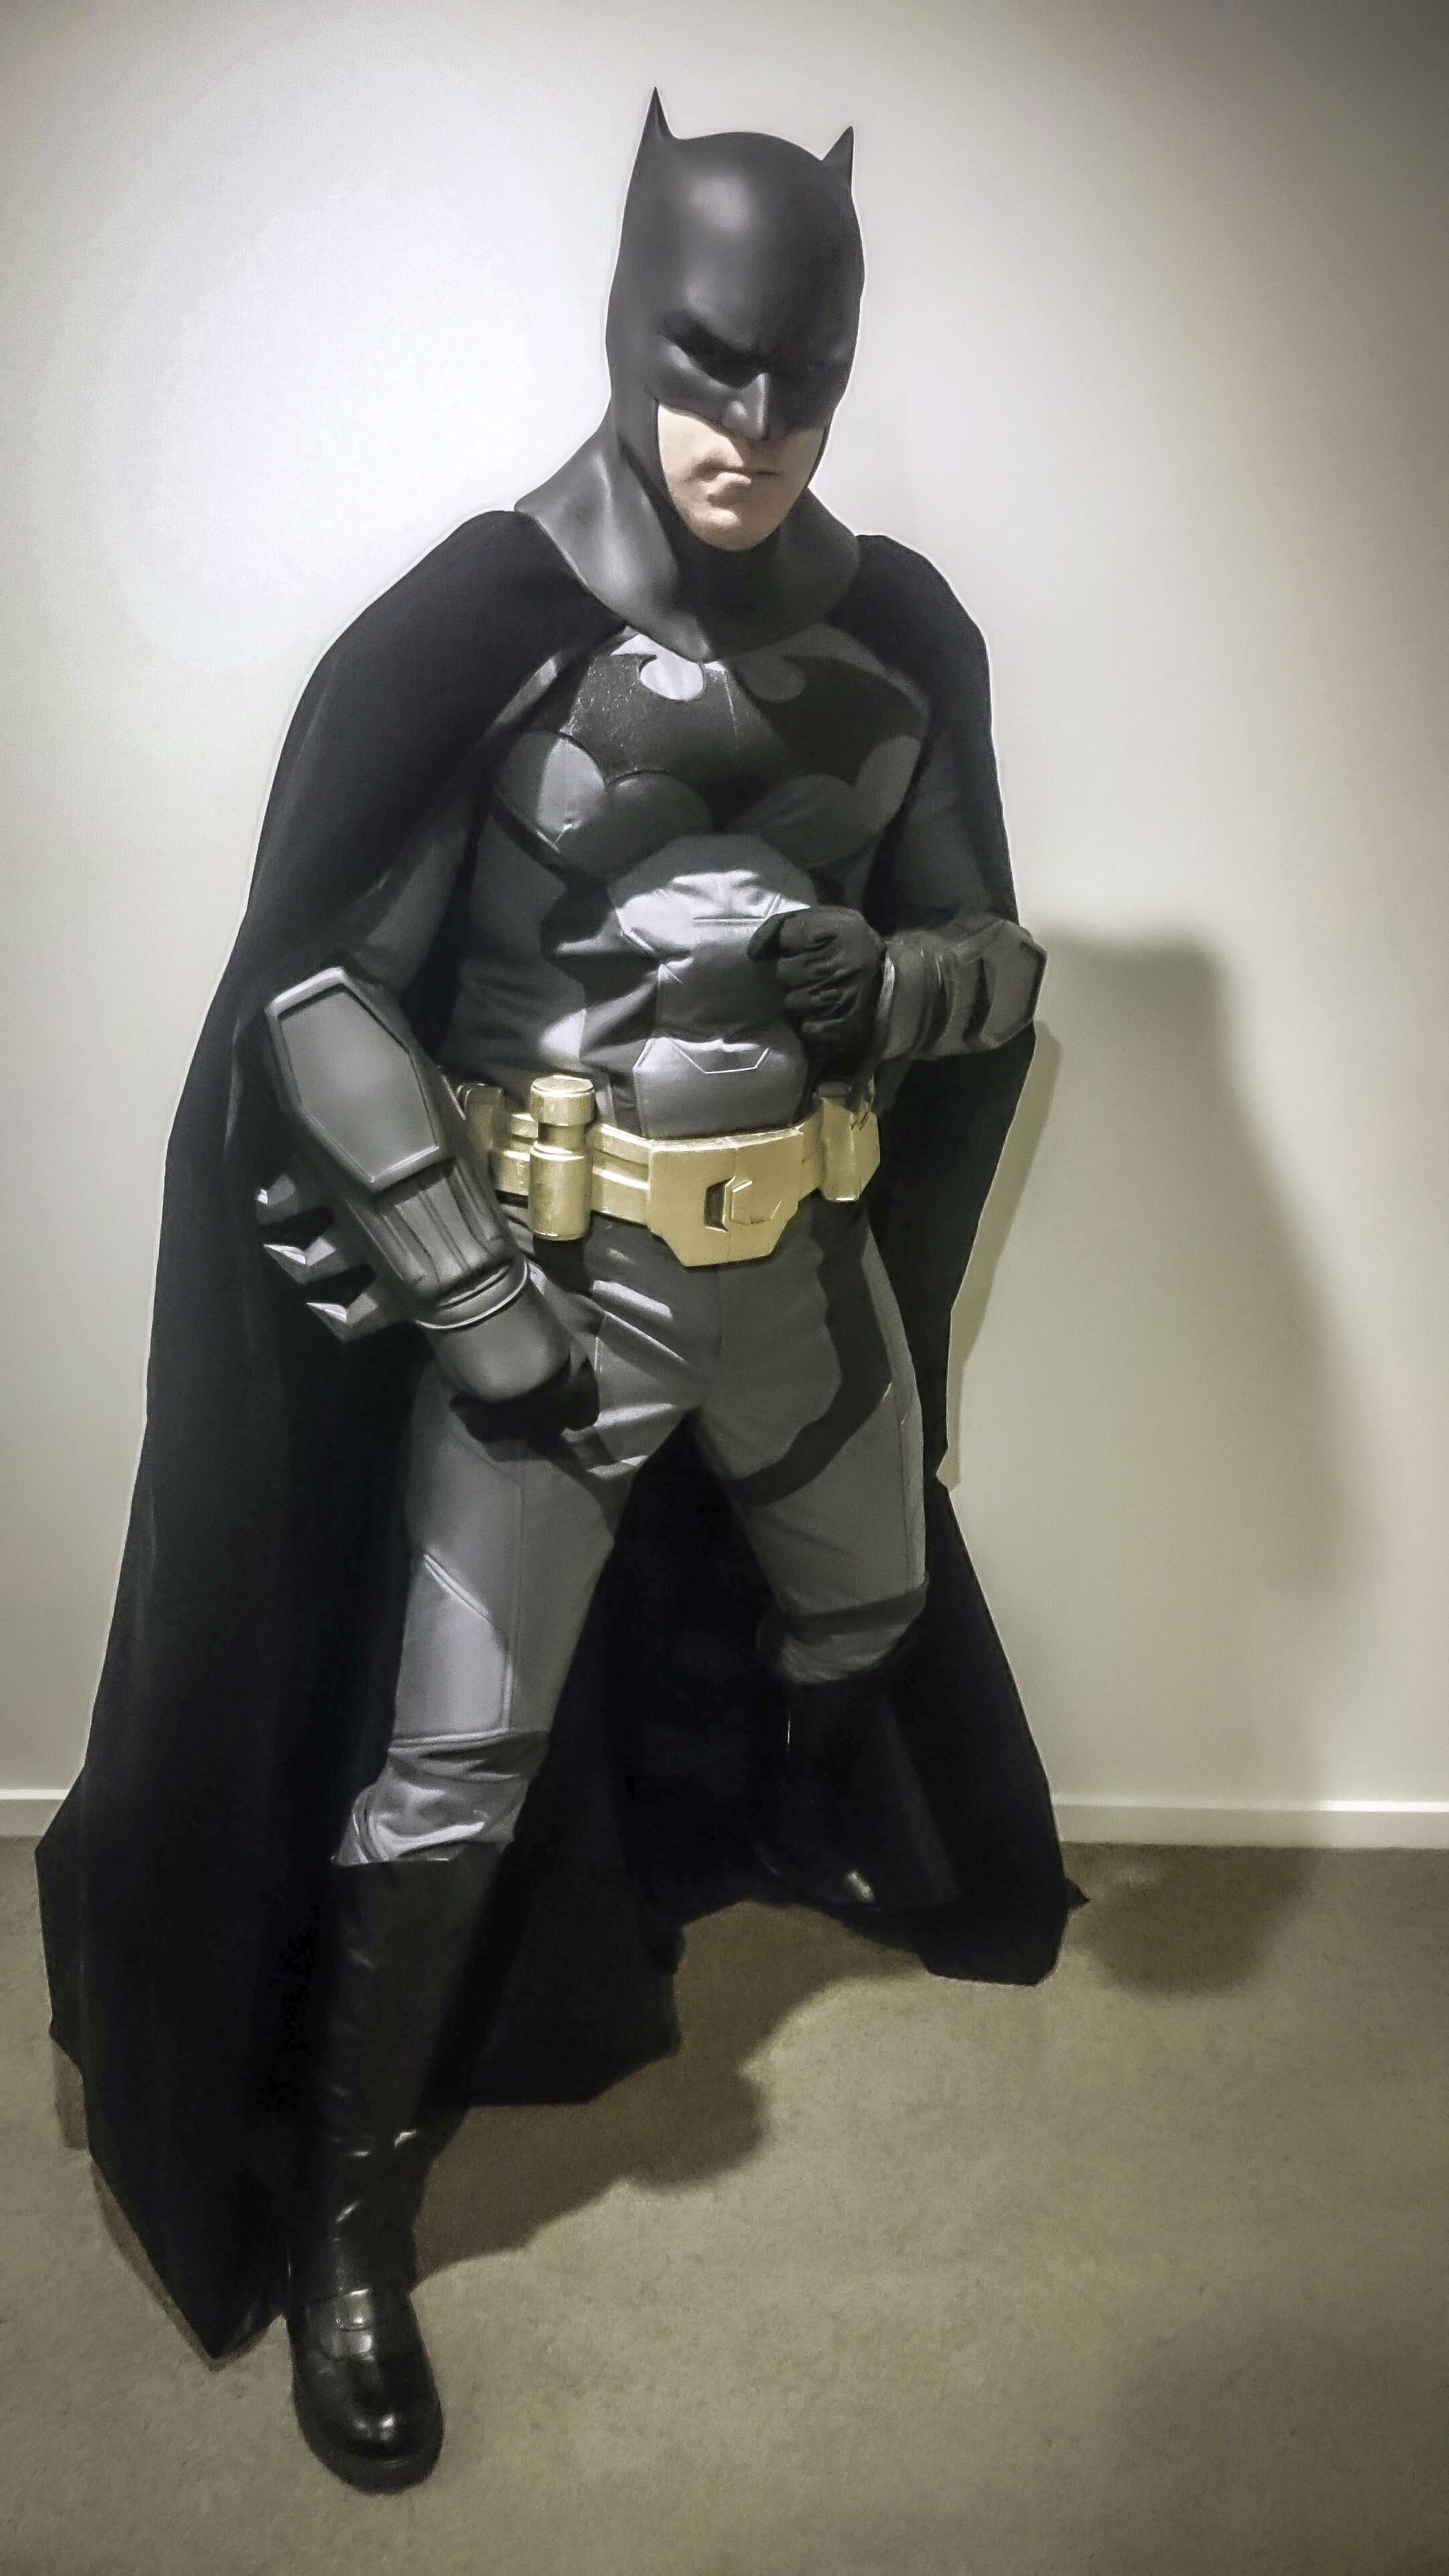
The final step was finishing: snapping on the pants, hemming, and securing the emblem with Gorilla Glue. Here is the suit ready to ship.


And here’s the complete costume as he appeared in it.