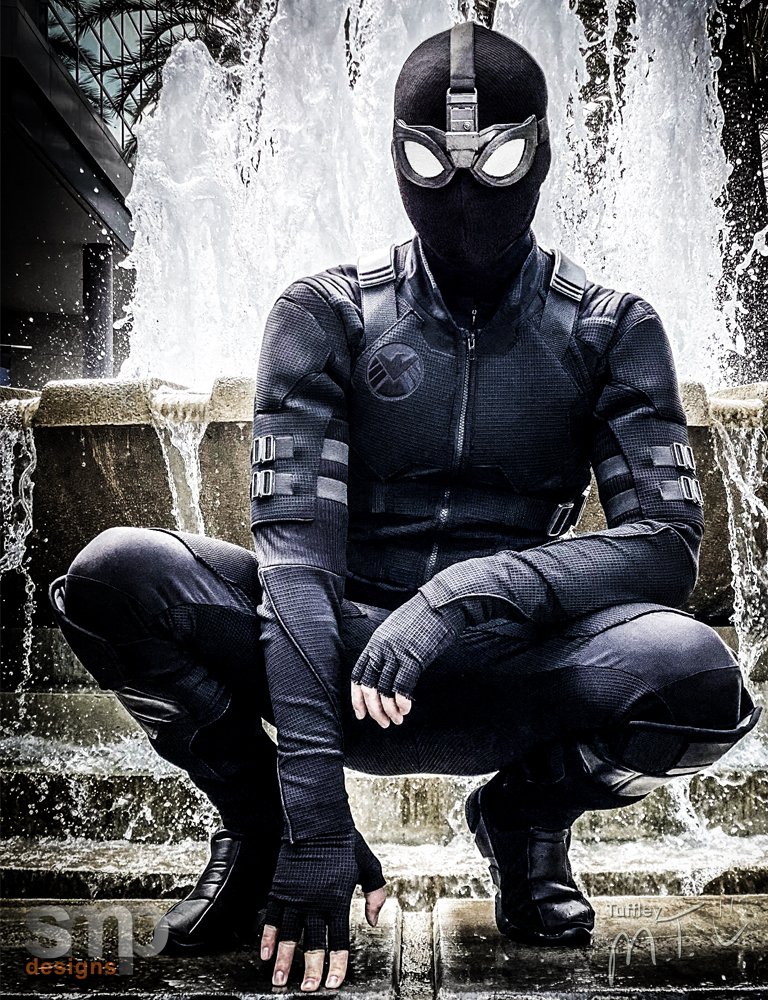
Spiderman 'Night Monkey'

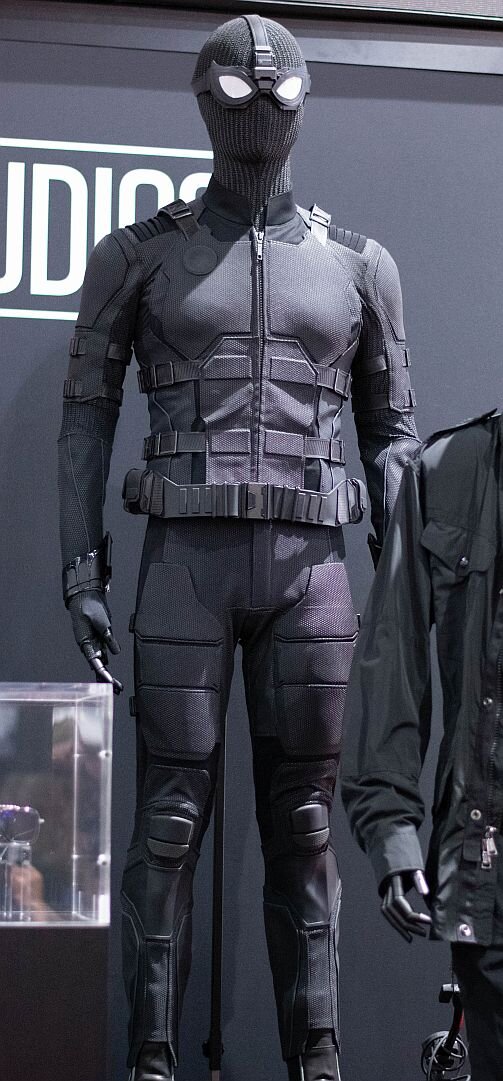
In this post, I'll cover a recreation of Spiderman's stealth suit (affectionately referred to as the 'Night Monkey') featured in the film Far From Home. Here are some images from the library of reference I'm using to put this project together.

I began, as always, by developing the base pattern. I built a simplified muslin mock-up based on one of my stock patterns and customized it to the client's measurements.
Once I assembled the base pattern, I sketched out the details for the vest and sleeves.
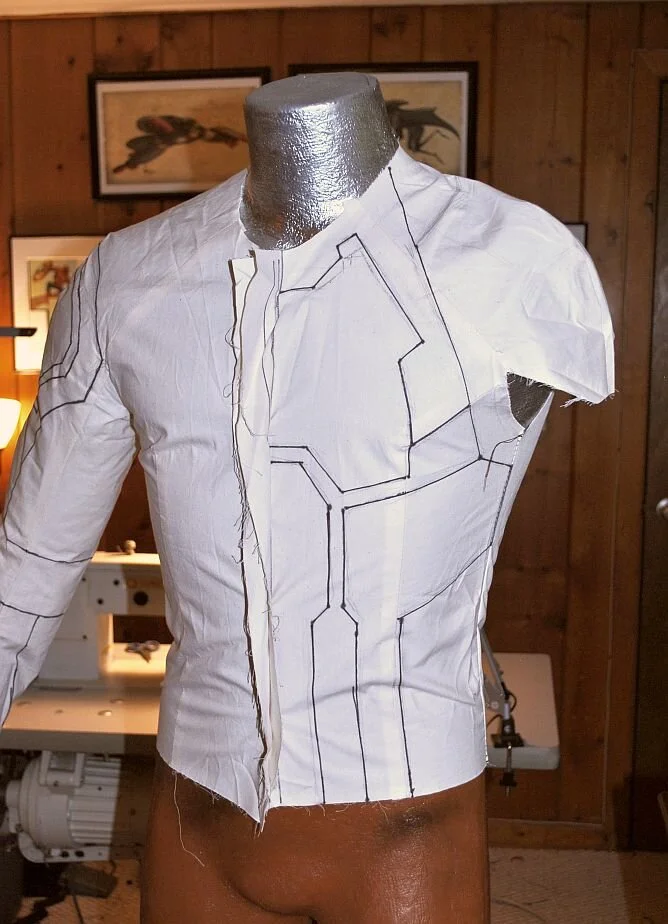

At this point, the mock-up was sent to the client for a fitting. Once I had it back with his notes, I could begin finalizing the patterns and building the costume.
I began with the vest. Using the altered muslin mock-up, I cut it apart and began transferring the patterns onto Swedish tracing paper, adjusting all the edges and curves and then using those patterns to start cutting and assembling the piece.


The front of the vest is constructed from a muslin base covered with black jumbo spandex (on the matte side). The textured areas of the fabric are made primarily from bullet stretch fabric. The material is relatively thin, so I backed it with muslin to give it a bit more weight and prevent it from stretching where I didn't want it to.
When backing or layering fabrics, I typically take the backing layer (in this case, the muslin, cut out the piece and spray it with Super 77. Then adhere that to the back of the shell fabric and cut out the final part.
The upper chest and abs were created and added to the front base. The chest 'armor' plates were made by layering the headliner to 2mm EVA foam, then glueing the piece EVA-side-down to the bullet. The plates were cut out with an allowance to turn the bullet under and then sewn down to the upper chest area.
While I, unfortunately, didn’t get any image of this process while building this suit, it's very similar to the method used to create the front plates and chest for the Punisher vest.
The detail 'pads' in the abs were also made by layering pieces of 2mm foam under the muslin and bullet.

The lower sides of the vest front are bullet backed with muslin and a very thin faux leather piping detail. The straps for the ab section were added at this point as well.
The back was made out of bullet backed with muslin, and once completed, the sides were sewn together and the edges bound off with strips cut from the bullet.
The next pieces added were the padded details under the arms. These were made out of thin faux leather backed with headliner foam and the 'ribbing' detail sewn in.
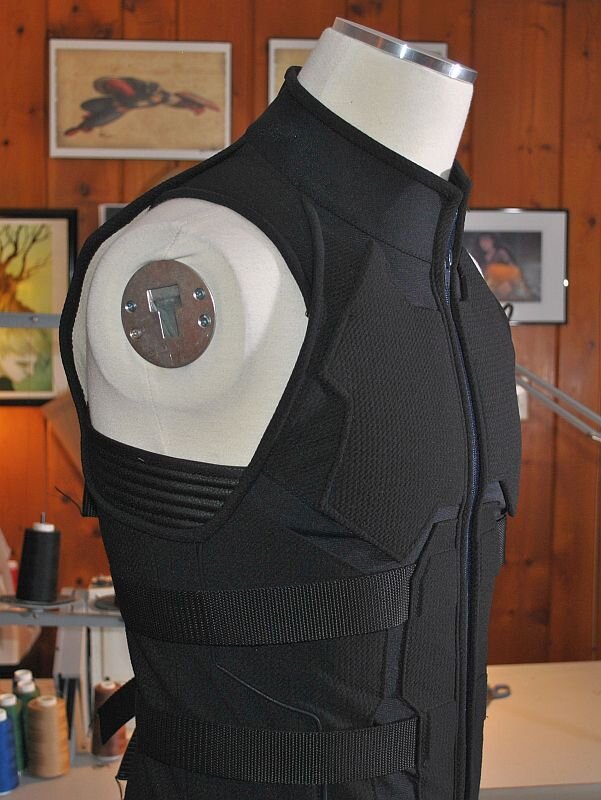
With the sides complete, I added the shoulders and collar. The shoulders are bullet and muslin, along with some headliner foam to give them a little more structure, support, and padding for the straps and buckles that will go over the shoulders.


The collar was added, the front and bottom edges of the vest bound off, and a temporary zipper was added for testing.

The 'armored' back plate will be constructed and attached separately. In the meantime, I needed to begin working on the hardware for the suit, as it will need to be incorporated as the suit is made.
Since the buckles on the suit are pretty specific and obviously custom-made, and none need to be functional, I decided to have them 3d modelled and printed. For this task, I naturally turned to my long-time collaborator, Jordan, from Jordan's Ironic Armory.
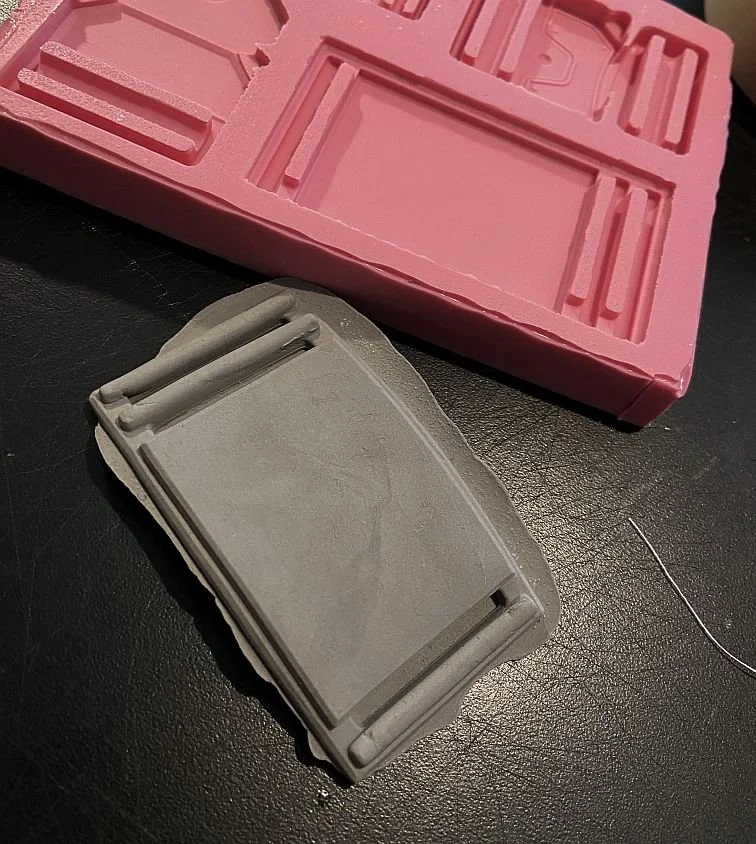
Jordan created models for each buckle type and size, printed them and then created a mold for me to use for casting. Since there are several copies of each, I just asked him to make the mold, and then I could run off the resin copies as needed.


These will all be cleaned up, sanded and painted as they are added to the suit. Here are some images of the raw casts being test-fit to the vest.


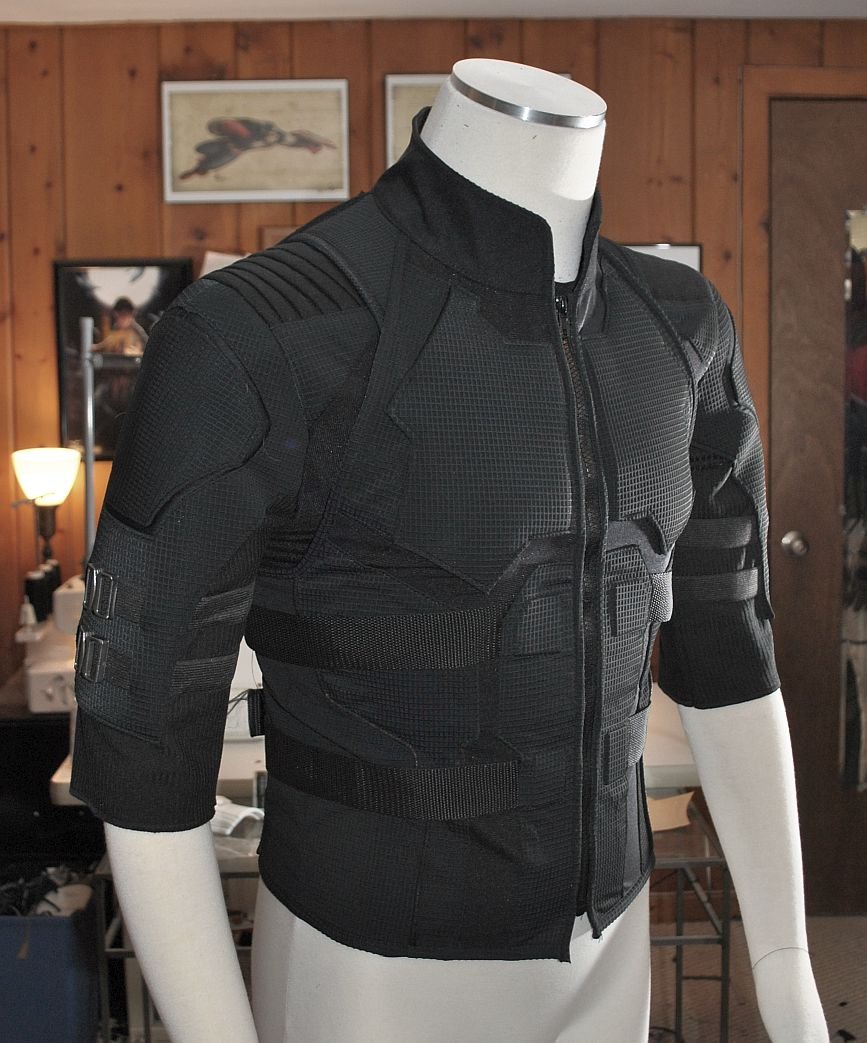
After reviewing the WIP photos, we decided to change the fabrics for this costume and use heavy textured spandex instead of the bullet. The bullet absorbs all the light and is too dark - the new material will show more details on camera and look more like the movie suit.
The entire vest was rebuilt in the new fabrics.


With the new vest constructed, I moved on to the undershirt. I took apart the mock-up pattern and used it to create the paper pattern. I also developed the layers for the shoulder plates on paper before beginning the construction.


The shoulders were then created by covering 2mm craft foam with the textured material. Those pieces were then sewn onto a base of black spandex backed with headliner foam. Next, the buckles and straps for the biceps were added.
The upper arm base was made of black ribbing backed with black jumbo spandex for added structure. This same ribbing was also used to create the cowl for this costume. The shoulder plate with straps was added to this piece.
Once the upper arm was complete, the upper shoulder piece that extended to the neck was built and attached to complete the biceps and shoulders.


The shirt's body was built in black jumbo spandex, and the sleeves were attached. Here are the shirt and vest at this point.


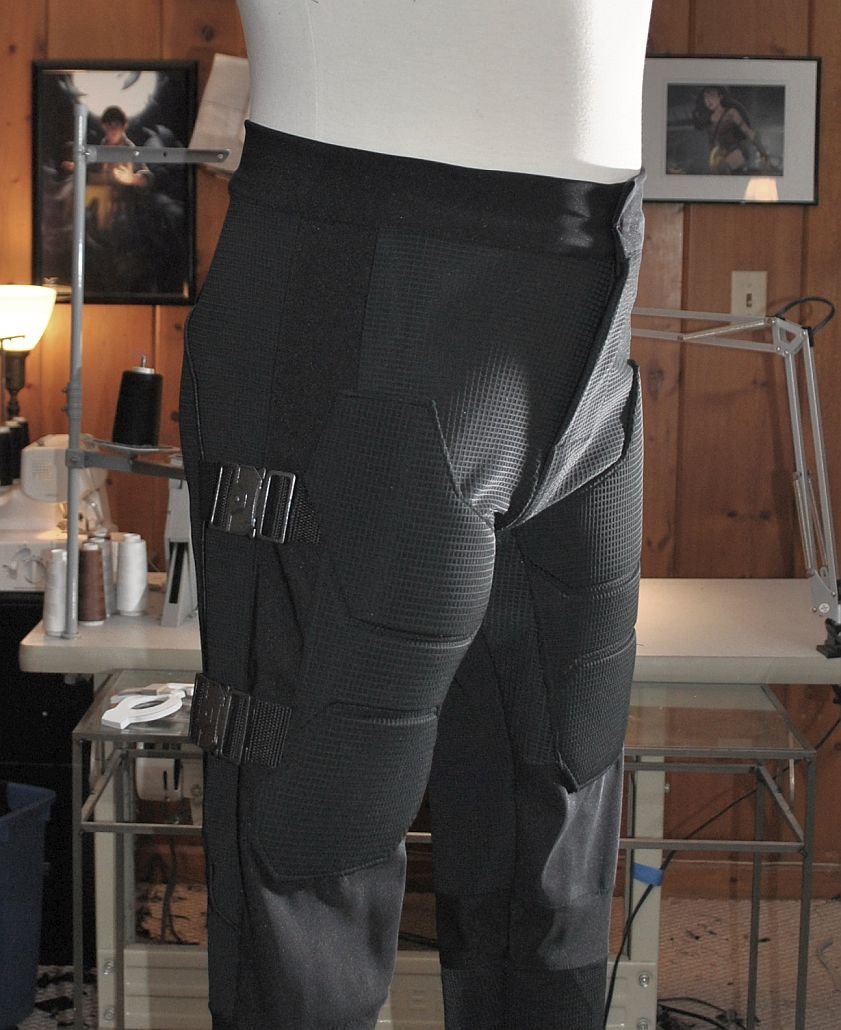
The forearms of the sleeves were then attached, and I moved on to the pants. I began by creating the upper front sections of the pants and attaching the thigh plates and straps/buckles.
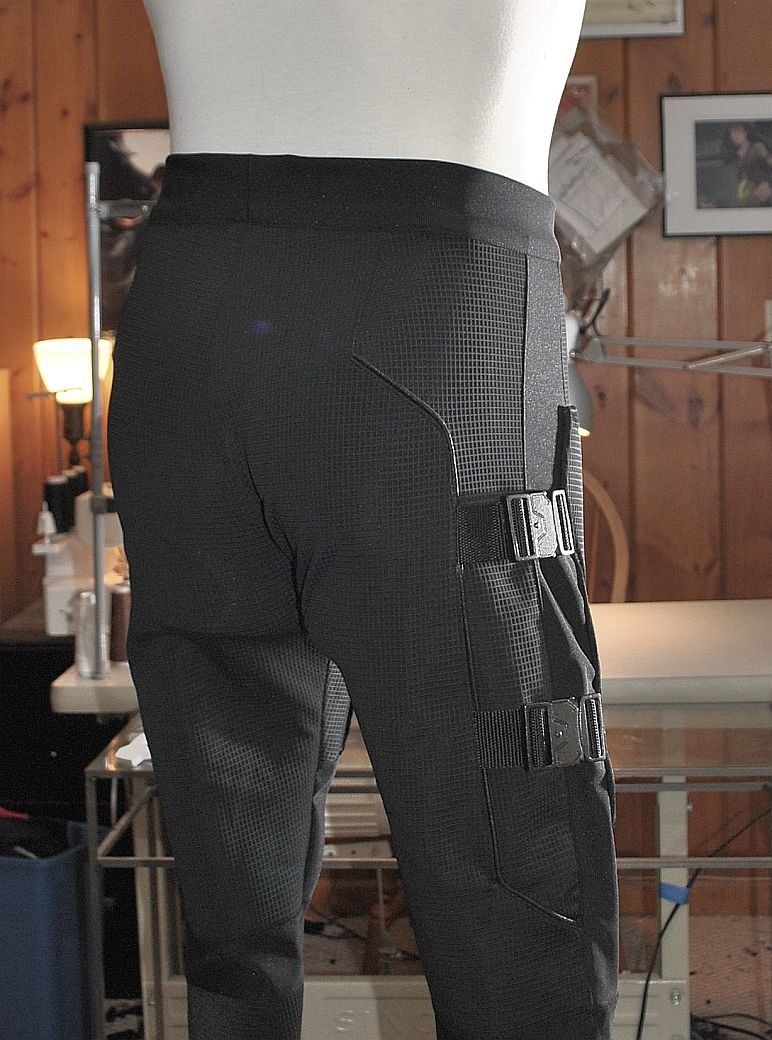
The thigh plates were made by layering 2mm EVA foam onto the headliner and then covering the entire piece with textured stretch material. The detail lines were sewn in, the edges turned under, and the plates sewn to the upper legs with the straps. The buckles were added, and the upper back section was built to complete the main pant pieces.


The bottom segments of the pants were made out of textured stretch material. All lower leg details will be made as part of the boots.
Next, I needed to finish the vest with all the hardware. For the shoulder straps, I had a couple of very specific ideas on what I wanted to do.
First, for the buckles that attach to the back, I wanted to embed Chicago screws into the resin pieces so they could attach very securely to the vest. Second, I feared the large shoulder buckles would snap (even if shaped while curing) if I cast them in resin. So, to give them some added flexibility, I cast them by pressing foam clay into the mold and then trimming them.

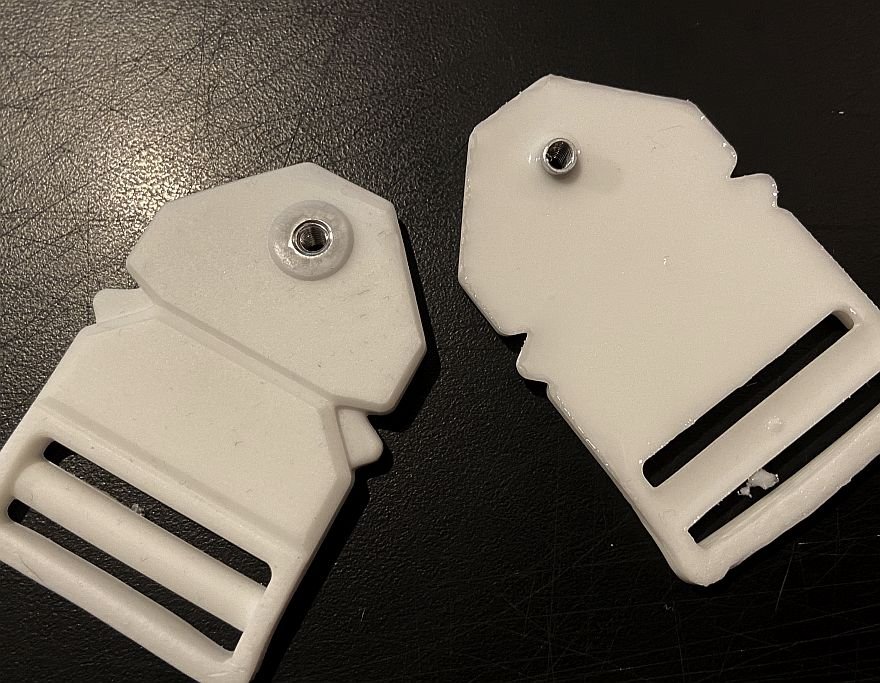
The small flat pieces on the spine were created in 2mm and 3mm foam. All the foam pieces were PlastiDipped, and all the hardware was primed, painted and added to the vest. I used rubber washers for the back shoulders to ensure the screws didn’t tear and pull away from the fabric.


The boots were next. I used my fitted boot pattern to draft the details I wanted to include. I then built the shafts for the boots with layers of headliner foam, faux leather and textured stretch fabric.
The knee details were made using 2mm EVA foam on a headliner base and then covered with faux leather and textured stretch fabric.
Lastly, I used a boot to create a masking tape mold and pattern for the shoe part of the boot. This was transferred to a paper pattern, assembled and glued to a base mesh running shoe.


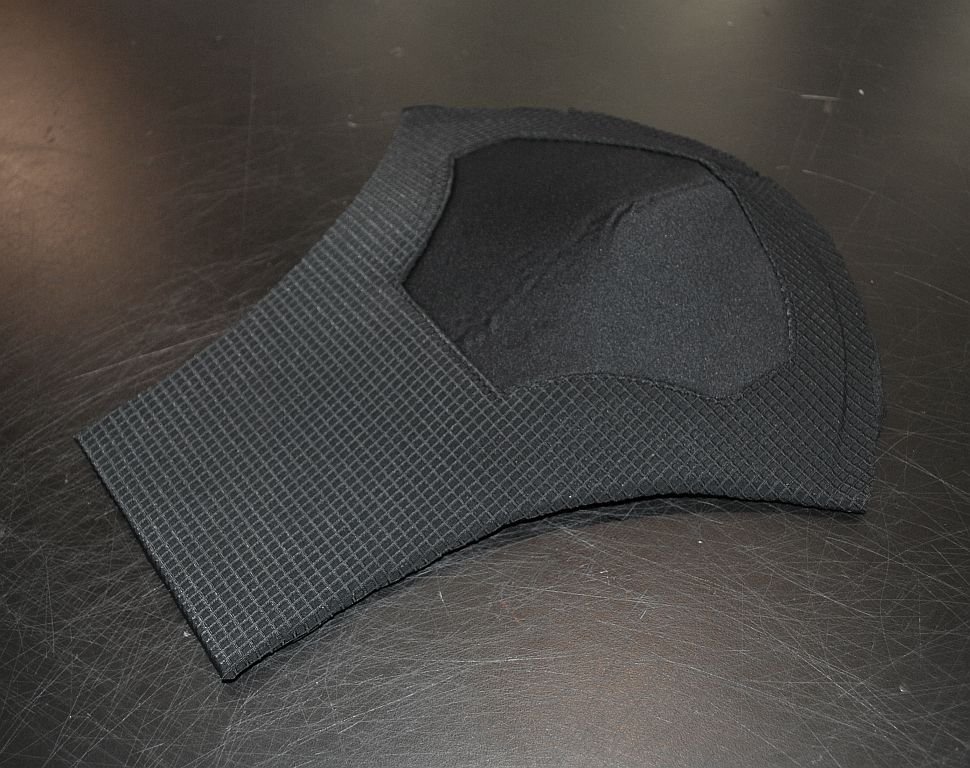
The cowl was a simple cowl pattern made in the same ribbed material as the sleeves but lined with black Ponte for structure.
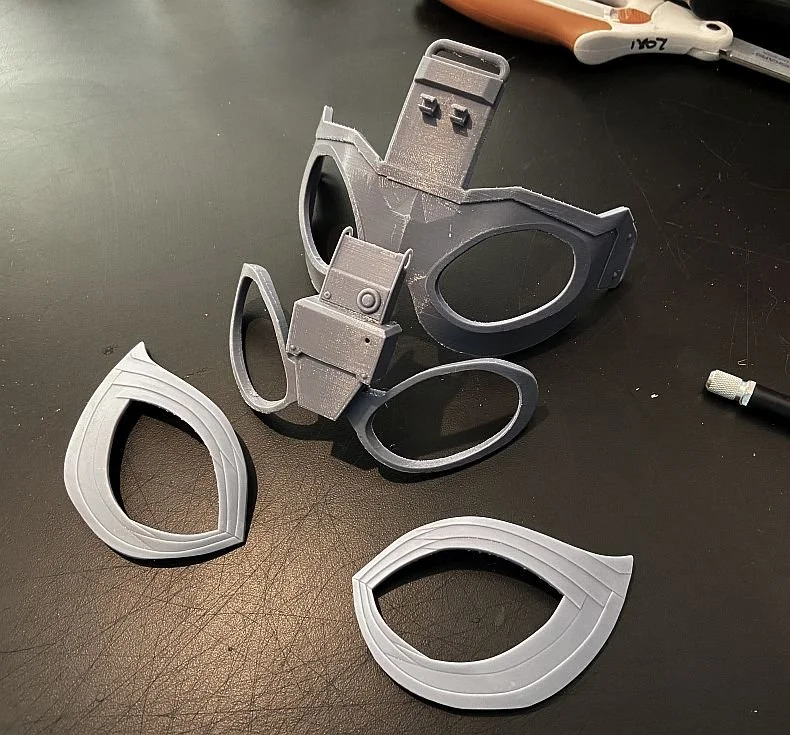
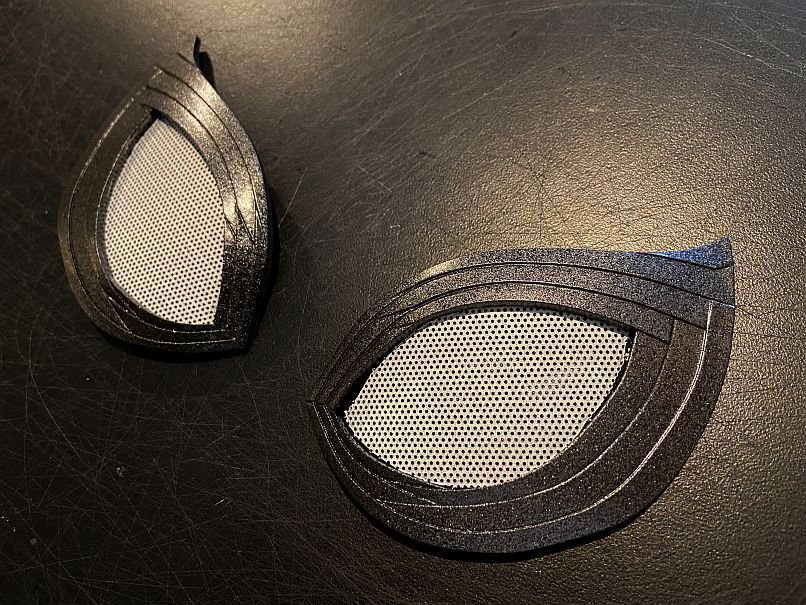
The goggles were modelled by @andrey.blend, printed by @crimsoncarlos, and sent to me. I used a computer fan screen for the lenses, sprayed them silver, and assembled the goggles. Finally, elastic was added to complete the head.


The belt, pouches, and gloves were built and the suit was sent off for a final fitting.
And the final project: