Wanda Maximoff

With the success of WandaVision, it was only a matter of time before a Wanda project kicked off here.
The starting point for the project was building a bodice mock-up that would fit the remote client. As usual, I began in muslin, sent it off for a fitting, and then started sketching the details on the altered toile.

With the details roughly sketched out and the pattern fit confirmed, the toile was cut apart, and the base construction began.
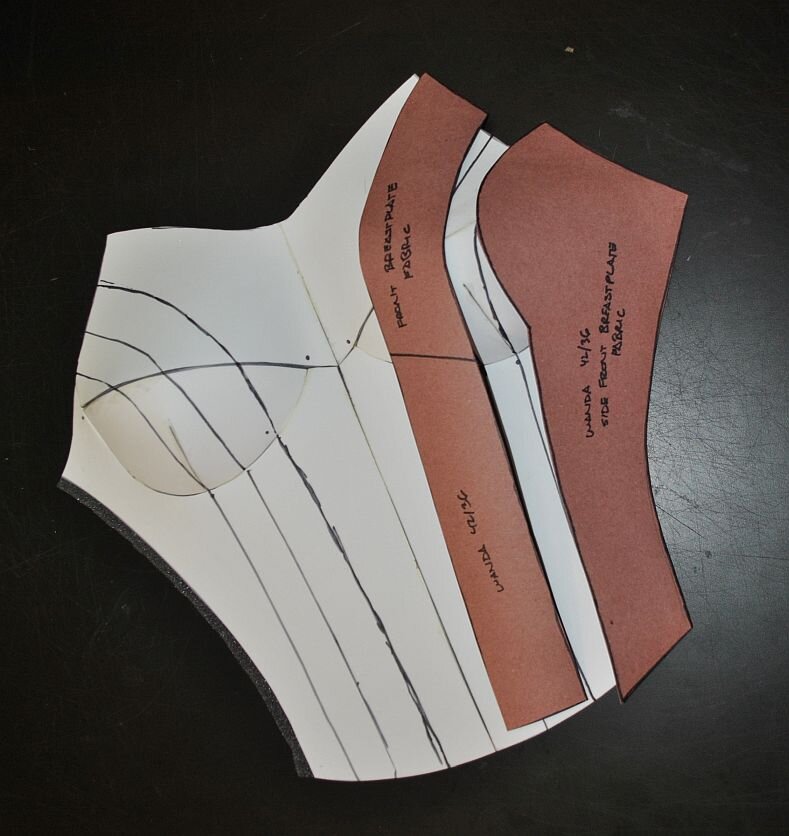
This costume build is similar to the Captain Marvel suit - it has a layered, very structured front with a lot of detail and needs a foundation that can support that structure but still be light, thin, and flexible. So, to create this piece, I wanted to create a breastplate template that could be built in 2mm EVA foam backed with headliner foam for comfort and padding.
Once the breastplate was assembled, the detail pieces were made using Swedish tracing paper to create rough sketches to scale.


To create the detail pieces for the bodice, I photographed the sketches on a board with set dimensions, imported the images into Inkscape, and then traced them to create full-scale, clean templates for the pieces.


At the same time, I created the templates for the peplum and the headpiece in the same manner.


In the meantime, the specialty fabrics were ordered. These are silicone-printed spandex in burgundy and black from Parallel Life Studios in France.

Once the fabrics arrived, I began by creating patterns for the breastplate to cover the areas with the material. I didn’t want to completely cover the breastplate with the printed materials for two reasons:
The fabric is quite expensive, and I have a limited amount, so I didn’t want to use it anywhere other than where it will be seen.
When I glue the foam detail pieces to the breastplate, I want them to be glued directly to the breastplate and not to the fabric. That way, there’s no risk of the pieces pulling away from the base. Also, the foam detail pieces will lock the edges of the fabric down.
With the patterns made, the pieces were cut from the printed fabric, sprayed generously with Super77 and applied to the breastplate.

I didn’t want the entire bodice made of foam to increase wearing ease and movement. So, the sides and back of the bodice (again, like Captain Marvel) were made in printed fabric backed with broadcloth. I created the patterns for those pieces using the altered toile and added the sides to the breastplate.
The finished bodice zips down the sides. So, at this point, I needed to finish the edges at the arms and bottom. These edges were bound in a burgundy thin faux leather that matched the printed fabric.


The back of the bodice was next. The back was cut out in sections - black faux leather and printed burgundy, and then all pieces were backed with muslin for stability.
I created piping with thin black faux leather and elastic cord to edge the black sections and then stitched all the pieces together.


I wanted to add more structure to the back of the bodice to balance it with the front, but I didn’t want to use foam, as I mentioned before. So, I decided to create a corset back to give me the structure and shape I wanted and still allow movement and flexibility.
The corset back was made of 2 layers of muslin that extended from the bottom edge of the bodice to just under the shoulder blades. The layers were stitched together to form channels, and the piece was boned with lightweight plastic boning.
This inner back was sewn down to the lower edge, and the sides floated inside the shell. The top and bottom edges were then finished with thin faux leather binding.


With the main bodice pieces assembled, I started the foam pieces: breastplate and stripes, peplum pieces and crown.
I printed the templates that I’d created earlier and cut them out. I traced the template onto a piece of 3mm foam that will be used as the base for the piece. The paper template was then sprayed lightly with Super77 and tacked to another piece of 3mm foam. I then began cutting the paper/foam layer into its component parts using an X-acto knife.
When all the pieces were cut out, I used contact cement to attach the segments forming the raised layer using the pre-traced layer as a guide.
An important step here is to leave the paper on the upper layers. This helps stabilize the thin piece and retains the detail lines that will need to be cut into the top layer once all of the pieces are glued down.
After the pieces were assembled, the detail lines were carefully cut into the top layer using the paper as a guide. When cutting these lines, you must be sure to only cut through about 2/3 of the top layer.
The paper was then carefully peeled away, and a heat gun was used to seal the foam and open the detail lines. Finally, the entire piece was coated with Plasti-Dip. This process was used to create all of the other foam pieces.


At this point, I want to point out a little difference about the crown. Since the crown has so many small edges and details, I didn’t want to try to cut them all out and glue them separately.
So, I cut out the paper template with a large amount of ‘flange’ around it which was adhered to a piece of 2mm foam with Super77. This piece will be the top layer of the finished crown. I then began cutting out all of the ‘negative space’ (the areas that will be recessed), making sure to leave the flange intact.
The flange and the paper held all of the crown pieces together and stabilised the thin foam. When all the details were cut, the layer was glued to 3mm foam with contact cement.
The crown was then cut out using the paper outline and coated with Plasti-Dip.


Once all the pieces were cut fully assembled, they were coated with several coats of Plasti-Dip and ready for paint.

The foam pieces were then painted before being attached to the bodice. All the paints are acrylic and were applied with sponge applicators and angled brushes. There are three colors: burgundy for the primary color, black and a subtle purple with a slight metallic sheen that I mixed.

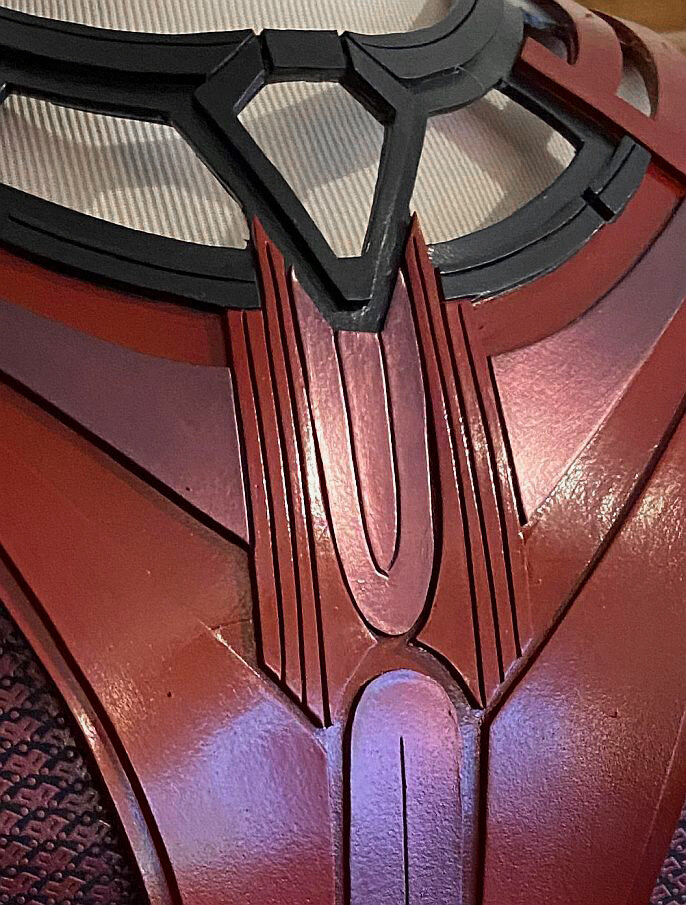
The side stripes for the bodice were also painted, and the three pieces were attached to the front of the bodice.
To attach the pieces, I pressed the pieces down and traced along the edges with a fine point sharpie to establish guidelines on the printed fabric. I then spread contact cement on the back of the foam pieces and the bodice over the exposed foam and up to, but not past, the guidelines on the printed material.
When the pieces were glued down, the foam details were anchored to the bodice's exposed foam and locked the edges of the printed fabric under the detail pieces.


Next up, the peplum is completed and the skirt and pants get underway. Stay tuned!